# Klyntar project intro

Collection of docs for project Klyntar

<figure><img src="/files/d5MfMmaKFVM7QDUn7b0v" alt=""><figcaption></figcaption></figure>


# About project

## Introduction

<figure><img src="/files/9FI8jNq4lVM6es3OQ9ji" alt=""><figcaption></figcaption></figure>

The first widely known cryptocurrency Bitcoin changed the rules of the game in its time. It was a real financial endgame that led to the creation of a multi-trillion crypto industry (as of 2024)

{% embed url="<https://coinmarketcap.com/>" %}

Being true fans and geeks who are inspired by cryptocurrency and the technologies/principles that underlie it, we also want to offer the world our project.

> **The idea was to create not another clone/fork, but a truly useful and long-lasting product. To do this, we have collected the best practices in the crypto industry, collected the most powerful and popular technologies and cryptography and are going to create a powerful foundation for the future decentralized ecosystem of services**

## What you can find here ?

### Decentralized L1 chain as a foundation for experiments

Klyntar is a decentralized L1 network. The same as Ethereum, Solana, TON and many others! You will be familiar with working with our project.

### Maximum decentralization: Multistaking - multichain multiasset liquid staking for max security

In an effort to increase decentralization rates and protect the network, as well as other chains in the ecosystem, we are introducing a **multistaking mechanism** - now you can protect the network by delegating your coins and tokens from other projects. This increases the number of potential validators in the Klyntar network, which makes the network stronger, more resilient and reliable!

{% content-ref url="/pages/WrudEbsL6Lm895dCtss8" %}
[Multistaking - native liquid staking, multichain multiasset staking and much more!](/project-litepaper-and-main-features/multistaking-native-liquid-staking-multichain-multiasset-staking-and-much-more)
{% endcontent-ref %}

### Interesting architecture: Multilevel sharding

As we think about the future, we are trying to solve the problem of network scaling right away. Dividing the network into several smaller networks (**shards**) has become a standard in the industry.

We decided to go further and use a multilevel sharding system for greater efficiency. It is like classic sharding, but it has its advantages.

{% content-ref url="/pages/VHiucNc7wyXWhQZlqB0e" %}
[Multilevel sharding and modularity](/project-litepaper-and-main-features/multilevel-sharding-and-modularity)
{% endcontent-ref %}

### Advanced cryptography

Any **crypto**currency contains the word **`crypto`**, which means that cryptography plays an important role in its basis.

In our project, we have collected the most popular and powerful hashing algorithms, signatures and others to use onchain and offchain.

{% content-ref url="/pages/GnBpl1FdqQkv78TH7ya5" %}
[Advanced cryptography - zk, mpc, fhe, post-quantum and much more!](/project-litepaper-and-main-features/advanced-cryptography-zk-mpc-fhe-post-quantum-and-much-more)
{% endcontent-ref %}

### XVM - WASM VM, EVM and any-VM (Move, Solana VM) via containers&#x20;

We want to expand the possibilities of writing smart contracts for our chain as much as possible, so you will have access to the capabilities of the two most popular virtual machines - EVM and WASM.

Another big extension - **containers**. Use the full power of ready codebases from package managers of popular programming languages - JS, Python, Rust, C-langs, Go and much more! Use the native access to the Internet, own schemes of parallelizations, access to GPU, external databases and so on.

Creating smart-contracts here is like average programming - no special restrictions. Full freedom for your masterpieces :relaxed:

And in the future, there will be more!

{% content-ref url="/pages/WkkfZ84Hn66k0grLy6ns" %}
[Virtual machines - EVM, WASM, containers and much more!](/project-litepaper-and-main-features/virtual-machines-evm-wasm-containers-and-much-more)
{% endcontent-ref %}

### Codeless smart-contracts - road to smart-contracts usage in real-world business

Codeless smart contracts will help in cases when you need to make a deal that requires protection from a decentralized network, but which is difficult to program as a code.

**For example, this could be control of a deal on RWA, protection of your deal in a Web2 online store, some verbal agreement in real life!**

Don't trust - verify. Delegate control of the security of your contract to the network and rest assured.

No code is needed - make a deal using a simple interface. Form the conditions with words. And our network using controllers and AI will help you

### Ecosystem of blockchains

Shared security model, common cross-chain interaction API and so on.

### Ecosystem of services

Having a powerful L1 chain and many features in our arsenal, we want to be useful for a variety of use cases. In addition to DApps that will be built on the network, we are also going to create services on our side that will expand the scope of our cryptocurrency.

Such useful services can be applications for RWA, insurance, lending & borrowing, human rights protection, protection of deals in the real world, AI applications, on-chain services, decentralized storage & GPU computing & cloud. We plan to make a big bet on RWA and Web2 thanks to our [codeless contracts](#codeless-smart-contracts-road-to-smart-contracts-usage-in-real-world-business) and maximum security thanks to [multistaking](#maximum-decentralization-multistaking-multichain-multiasset-liquid-staking-for-max-security).

### Let's get started!

We hope we managed to interest you - let's continue with a detailed acquaintance. We recommend you to take a look at the following sections!


# Unique architecture - take the best from L1 and L2 chains

## Two main components

## Insane fast finalization

## Outsource finalization


# Multilevel sharding and modularity

<figure><img src="/files/iGCpnw8iVGGFxYihpqGy" alt=""><figcaption></figcaption></figure>

## Intro

As we think about the future, we are trying to solve the problem of network scaling right away. Dividing the network into several smaller networks (**shards**) has become a standard in the industry.

We decided to go further and use a multilevel sharding system for greater efficiency. It is like classic sharding, but it has its advantages.

## Level 1 - appchains

At the first level, the networks will be divided according to their purpose. These will be independent projects that will join our ecosystem for common shared security, as well as various bonuses such as gasless cross-chain transfers and much more.

{% hint style="success" %}
The first project and blockchain in the ecosystem will obviously be our native blockchain - **Klyntar**
{% endhint %}

## Level 2 - single chain default sharding

This level of sharding is the most familiar to you - you may have seen it in other projects where there is also sharding.

At this level, we will divide the **Klyntar** blockchain into several independent subnetworks that:

1. Will use the same validator space - if there are N validators in the network in total, then there will be N validators on each shard (the same level of security)
2. Will work independently of each other and generate blocks in parallel - this increases the network throughput

We will use user migration mechanisms and smart contracts on new shards to load them evenly.

Such mechanisms include:

1. Bonuses for users for account migration - several gasless transactions, various boosts, etc.
2. [**Storage-by-subscription**](/web1337/advance-web1337-usage/abstraction/storage-abstraction/pay-for-storage-rent) mechanism for smart contracts - allow a smart contract not to pay for storage for some time on a new shard
3. A **coercion mechanism** that will limit the ability to use contracts or user accounts until they move to a new shard

## Level 3 - additional levels of parallelization

At the third level, we are also trying to improve the scalability of the network by parallelizing the execution environment. Find out more here:

{% content-ref url="/pages/Uaw6wJi8kXxbSxttJdQx" %}
[Parallel execution](/web1337/advance-web1337-usage/parallel-execution)
{% endcontent-ref %}

## Also

In the future, we also plan to add the ability to separate the block verification process from the approval process, which will make the network **more modular** and, for example, run two modules on different machines


# Multistaking - native liquid staking, multichain multiasset staking and much more!

## Intro

In an effort to increase the user experience and add more network features we are introducing a **multistaking mechanism**.

{% hint style="success" %}
**Multistaking** is a general collective name for advanced staking mechanisms that are aimed at maximum security, decentralization of the network. It also improves the user experience for users, validators and stakers.
{% endhint %}

Multistaking includes:

1. [#native-liquid-staking](#native-liquid-staking "mention")
2. [#multichain-multiasset-staking-and-social-value-points](#multichain-multiasset-staking-and-social-value-points "mention")
3. Other future options and improvements

## Native liquid staking

Since our network relies on the optimistic assumption that most validators will be honest, we decided to follow the Avalanche path - **we have no slashing**

{% embed url="<https://docs.cdp.coinbase.com/delegation/docs/avalanche-faq>" %}

The network remains decentralized and fault-tolerant, and in addition - validators and stakers are protected. This creates excellent opportunities for us to implement **native liquid staking**:

{% hint style="info" %}
In simple terms - you will be able to transfer coins to other addresses even if they are sent to staking. Since there is no slashing - the rate of the native coin will always be equal to the rate of the liquid staking token
{% endhint %}

## Multichain multiasset staking & social value points

In an effort to increase decentralization rates and protect the network, as well as other chains in the ecosystem, we are introducing a new mechanism - now you can protect the network by delegating your coins, tokens from other projects. Also, you can use **social value points** - details will be later :wink:

This increases the number of potential validators in the Klyntar network, which makes the network stronger, more resilient and reliable!

### How it works ?

On the page with information about the validator, you will notice the **multistaking points** section. These points are credited to the validator when you stake coins/tokens on other blockchains in smart contracts or use your social value points to delegate to validator.

For this, validators will credit you with part of their rewards depending on the % that you staked.

<figure><img src="/files/kPFfAk5xil8vhW0GTC14" alt=""><figcaption></figcaption></figure>

<figure><img src="/files/lYoFIuG77EvNw5GNMTOj" alt=""><figcaption></figcaption></figure>

### What coins/tokens/else can be used for multistaking

See here:

{% embed url="<https://docs.klyntar.org/build-core-and-join-network/staking/multistaking/supported-networks-and-tokens>" %}

See also

{% embed url="<https://docs.klyntar.org/build-core-and-join-network/staking/multistaking/social-media-multistaking>" %}

### Unfrozen liquidity

When you stake your coins, ERC-20 tokens, LSTs, LRTs and others - you receive a token in return equal to 1:1 - to maintain liquidity.

For example, if you stake 1 TRON($TRX), you will receive 1 KLYTRON in return. This way, you can continue to use your coins.

### No slashing

Our smart contracts **do not provide for the possibility of slashing**. This means that only you have access to your funds. If the validator that you staked on violates the rules of the Klyntar network, it will simply be excluded from the set, but your tokens on other blockchains **cannot be slashed**.

Please, DYOR the smart contracts yourself:

{% embed url="<https://github.com/KlyntarNetwork/MultistakingContracts>" %}

## How to start ?

Find more details in appropriate section in our docs

{% embed url="<https://docs.klyntar.org/build-core-and-join-network/staking/multistaking>" %}

Also, here are three examples of multistaking - with native coins of other networks, ERC-20 tokens in these networks and **social points**:

{% embed url="<https://docs.klyntar.org/build-core-and-join-network/staking/multistaking/work-with-native-coins>" %}

{% embed url="<https://docs.klyntar.org/build-core-and-join-network/staking/multistaking/work-with-erc-20-tokens>" %}

{% embed url="<https://docs.klyntar.org/build-core-and-join-network/staking/multistaking/social-media-multistaking>" %}


# Checkpoints mechanism

## <mark style="color:red;">Problem</mark>

### PoS/BFT blockchains are vulnerable to so-called <mark style="color:red;">long-range attack</mark>

Its essence is that when you start synchronizing your node with the current state of the blockchain, you have to start checking blocks 0,1,2,... and so on. At the same time, you need to take these blocks from somewhere and here is the problem - **how to make sure which block is valid?**

If, say, block 1337th was generated and confirmed by the network more than 3 years ago, then with a high degree of probability those old validators are no longer active and may have even removed their shares from staking. A problem arises - you cannot clearly determine which block with index 1337 was correct - anyone can offer you any valid fork.

## What are hostchains ?

**Hostchains** are independent L0-L1 blockchains that rely on their own security, fault tolerance and decentralization.

> ### We use their <mark style="color:red;">TOTAL POWER</mark> as the maximum source of liquidity and decentralization

## Solution

{% hint style="info" %}
In order for you to be able to check the relevance of your copy of the blockchain, the current quorum (current validators who have frozen their stake and who can be trusted because they have something to risk) makes "checkpoints" to other blockchains once per epoch (or with other frequency)
{% endhint %}

A checkpoint is a fact that looks like this, for example:

```json
{ 
    epoch: 167,
    lastLeader: 27,
    lastBlockIndexByLeader: 56,
    lastBlockHashByLeader: 'aaaa...'
}
```

If such a message is saved on many blockchains, then even after many years it can be trusted, because in order to potentially change it, attackers would need to compromise most of the blockchains.

{% hint style="success" %} <mark style="color:red;">**TLDR**</mark> - having found such a message in 2/3 of the blockchains that we will use to maintain checkpoints, you can be confident about the validity of your own copy of the state and blockchain.
{% endhint %}

## How to find checkpoints ?

{% hint style="info" %}
The same is here ⇒ [Hostchain checkpoints](/build-core-and-join-network/explorers-and-how-to-use-them/usage-guide/network-info/hostchain-checkpoints#solution)
{% endhint %}

In explorer visit the page about checkpoints'

<figure><img src="/files/fOaR3INRrgFr0dvSt3z8" alt=""><figcaption></figcaption></figure>

Here for each epoch, a list of checkpoints and links to the corresponding transactions in other blockchains is available.

Here **Bitcoin**, **Ethereum** and **Solana** are used as examples

In many cases, it is recommended to trust the validity of the epoch data where 2/3N checkpoints are available. This is a guarantee that the checkpoint is made forever

Long story short you can trust this

<figure><img src="/files/dNH9Jo8drOZpysKjuNRV" alt=""><figcaption></figcaption></figure>

And this:

<figure><img src="/files/4ht3zwKQixyN0y2U00vk" alt=""><figcaption></figcaption></figure>

But doubt this:

<figure><img src="/files/p69tiasAXIvA5PIaFpdb" alt=""><figcaption></figcaption></figure>


# Advanced cryptography - zk, mpc, fhe, post-quantum and much more!

<figure><img src="/files/EEa8QklKxVzi3zgOhxQZ" alt=""><figcaption></figcaption></figure>

## Intro

Any **crypto**currency contains the word **`crypto`**, which means that cryptography plays an important role in its basis.

In our project, we have collected the most popular and powerful hashing algorithms, signatures and others to use onchain and offchain.

## Hashing

Mainly 2 algorithms are used:

1. SHA3 - inside the EVM. SHA3 has proven itself as a reliable and widely used algorithm
2. BLAKE3 - for our needs. Amazingly fast and one of the newest hashing algorithms that even outperforms SHA3 in some metrics. BLAKE3 was chosen as the main candidate to be used as the lead hash function for getting block headers' hashes, hashes of workflows, services archives and so on. Superfast, supports **PRF**, **MAC**, **KDF**, and **XOF** modes, highly parallelizable and so on.

<figure><img src="/files/fe2jijVNtKYwPeYlEALR" alt=""><figcaption><p>Read more <a href="https://github.com/BLAKE3-team/BLAKE3">https://github.com/BLAKE3-team/BLAKE3</a></p></figcaption></figure>

Since BLAKE3 supports **XOF** mode i.e. output length of a hash might be variable(like in SHAKE hashing scheme). This is important in case of using them as a quantum secure alternative to 128 or 256 bits schemes which can be abused by Grover or BHT algorithms.

## Default signatures - Ed25519

Ed25519 was introduced in OpenSSH version 6.5. This is an implementation of EdDSA using the [<mark style="color:purple;">Twisted Edwards curve</mark>](https://en.wikipedia.org/wiki/Twisted_Edwards_curve). It uses elliptic curve cryptography which provides better security and higher performance compared to DSA or ECDSA.

{% hint style="info" %}
For any type of interaction with KLYNTAR, you must have a pair of keys. You use the private key to sign the data, while the public key is used to verify the signature. In general, the principle is familiar to everyone.
{% endhint %}

Get details here:

{% content-ref url="/pages/epG6PrAk7o3RTwfjok3g" %}
[Default Ed25519 transactions](/web1337/transactions-and-smart-contracts/default-ed25519-transactions)
{% endcontent-ref %}

## Multisig and threshold-sig algorithms

To let the group of people to control one wallet and/or perform transactions with smart contracts, multi-signature functionality is required.

{% hint style="info" %}
We use BLS and TBLS algorithms based on the BLS12-381 curve
{% endhint %}

#### BLS

Multi-signatures are versatile and can be useful in many places. For example, their advantage is that it is easy to achieve efficiency in generating *<mark style="color:red;">**N of N**</mark>* signatures - for this you need *<mark style="color:red;">**N**</mark>* members to sign the message ***M*** with their private keys, and then aggregate public keys and signatures and get the master key of the group *<mark style="color:purple;">**PubN**</mark>* and signature *<mark style="color:purple;">**SigN**</mark>*.

Thanks to the properties of aggregation, it will not be necessary to store N signatures and N public keys in the blockchain (as happens in naive multi-signature implementations), and instead of N signatures, it will be enough to check only 1 aggregated one, which gives us super efficiency.

<figure><img src="/files/LpjmhXb84YrQVtnyUETn" alt=""><figcaption><p><a href="https://asecuritysite.com/signatures/js_bls">https://asecuritysite.com/signatures/js_bls</a></p></figcaption></figure>

With BLS you can initiate:

1. N of N transactions
2. T of N transactions (T\<N)
3. You can use it for default transactions and within smart-contracts for EVM & WASM virtual machines

Get the details about BLS usage here:

{% content-ref url="/pages/ZaUuVaN5Yw1X56o6aKFm" %}
[BLS multisig transactions](/web1337/transactions-and-smart-contracts/bls-multisig-transactions)
{% endcontent-ref %}

#### TBLS

The problem arises when not all signers may agree with the signature decision, but it is enough just to reach a certain threshold T (that is, at least *<mark style="color:red;">**T of N**</mark>* participants agree to sign the transaction). In this case, when using multi-signature, we need to create some additional execution rules, and the size of the proof also grows.

Let me give you an example - let's say we have 10 people who decided to generate a signature using BLS multi-signature (for a transaction, staking, fixing an unobtanium or something else). Let 6 of them agree, and 4 others - against. At the same time, you set a threshold on your public aggregated key at 6/10 in advance.

It's no problem for 6 people to sign something and then aggregate their 6 public keys into a single public BLS. With a signature, it's the same - everything comes down to one thing.

<figure><img src="/files/YQxS3RSrcvAdlot1YV37" alt=""><figcaption></figcaption></figure>

However, to prove to the network that the 6/10 threshold is met, you must provide 4 separate 48-byte addresses of those who disagree. This is because there is no other way for the network to find out how many of the keys are included in MasterPub1-6. This leads us to difficulties because there may be not 10, but 200 signers.

It would be nice if all the "magic" was performed outside the blockchain - the nodes will not know about any thresholds, they will not disclose the public keys of dissenters, and so on. All the blockchain needs to know is the fact that the required threshold has been reached and that we have a valid signature.

Get the details about TBLS here:

{% content-ref url="/pages/HmFZ06Ik1k3wtYcaFBhp" %}
[TBLS thresholdsig transactions](/web1337/transactions-and-smart-contracts/tbls-thresholdsig-transactions)
{% endcontent-ref %}

## Post-quantum cryptography

Generally speaking, the most popular and used algorithms can be counted on the fingers literally in every category:

* Hashes - SHA families, old MD, BLAKE hashes
* Signatures - RSA, ECDSA, EdDSA, Ed25519
* Symmetric encryption - AES, CAST, ChaCha20
* Key exchange - ECDH, DH, X25519

They have worked well for a long time, are open source (consistency with the [***Kerckhoffs principle***](https://www.techtarget.com/whatis/definition/Kerckhoffs-principle#:~:text=Kerckhoff's%20principle%20is%20the%20concept,the%20key%2C%20are%20publicly%20known.)), and have been subjected to research and attacks for many years. However, nothing lasts forever and gradually the security of these algorithms will fall due to the advent of quantum computers.

As mentioned earlier, quantum computers are not some magical black box that "calculates something quickly". These are very specific mathematical algorithms, but their difference from the standard mathematical hacking paths is that they use another fundamental science - physics.

In mathematics, it can't happen that zero suddenly becomes one if you don't like the answer. In quantum mechanics, it is possible.

If earlier, within the framework of classical attacks on algorithms, a mathematical approach was used (not taking into account attacks through third-party channels such as signal interception, van Eyck interception, etc.), now physics and the nature of fundamental particles of the Standard Model come into play.

{% hint style="info" %}
Therefore, we have a very specific need for the use of post-quantum security mechanisms at KLYNTAR. We need to secure everything from signatures to architectural concepts due to the fact that we rely on the security of other chains, so if they are vulnerable, then this could threaten us (it could, because it does not threaten now).
{% endhint %}

At the initial stages, we decided to use Dilithium and BLISS signatures. Among other algorithms, their ratio of security and sizes of public keys + signatures seemed to be optimal. They show good speed and can take part in various events on KLYNTAR. We recommend using them as an advanced security address. For example, you can store large amounts on them and use them infrequently or even through a cold wallet.

***Dilithium***

![](/files/oSMgk4XinKLIadRvxux8)

This algorithm is a NIST candidate and provides the ability to generate key pairs and signatures. Widely popular, studied at the highest levels. It is included in the post-quantum implementation of *<mark style="color:red;">**OpenSSL**</mark>*, is being studied by CloudFlare, and is included in their CIRCL repository.

![](/files/nRSxDpHNma4cj9sQOGs0)

{% embed url="<https://github.com/cloudflare/circl>" %}

We just use this implementation from CloudFlare by providing a standard set of functions like generate, sign and verify. There are several implementations depending on the NIST security levels. Here are their characteristics:

![](/files/lbO2gPF9GPs5ckqFxQMi)

The creators themselves recommend using the Dilithium3 parameter set, but we use Dilithium5 due to greater security. However, to change the security level, it is enough to simply change one line so that such changes can be made if necessary. Here is a comparison table of security levels according to NIST

<table><thead><tr><th width="302.71790284058636" align="center">NIST security level</th><th width="267.9124899508415" align="center">Hack is so difficult as...</th></tr></thead><tbody><tr><td align="center">1</td><td align="center">Bruteforcing AES-128 key</td></tr><tr><td align="center">2</td><td align="center">Find a collision for SHA-256</td></tr><tr><td align="center">3</td><td align="center">Bruteforcing AES-192 key</td></tr><tr><td align="center">4</td><td align="center">Find a collision for SHA-384</td></tr><tr><td align="center">5</td><td align="center">Bruteforcing AES-256 key</td></tr></tbody></table>

***BLISS***

The second and priority post-quantum signature algorithm will be BLISS. It is also based on lattice cryptography, more specifically RLWE (Ring Learning With Errors). Although it creates a small signature and has good security, it has not been listed as a candidate for standardization by NIST. It uses the Fiat-Shamir trellis signature scheme and its improved sample selection method for parameters. It also uses Huffman encoding to compress the signature.

{% embed url="<https://bliss.di.ens.fr/>" %}

{% embed url="<https://asecuritysite.com/signatures/go_bliss>" %}

Get the details about post-quantum accounts here:

{% content-ref url="/pages/WeNh41PlyVxNHw0rB28p" %}
[Post-quantum transactions](/web1337/transactions-and-smart-contracts/post-quantum-transactions)
{% endcontent-ref %}

{% content-ref url="/pages/iwqsuUjlaOSVMmCpFD4q" %}
[Post-quantum cryptography](/smart-contracts-and-vms/advanced-vms-usage/cryptography/post-quantum-cryptography)
{% endcontent-ref %}

## Zero Knowledge Proofs

### zkSNARK

We understand the importance of using zero-knowledge cryptography in various areas and strive for full integration with existing and new solutions.

Since KLYNTAR has a support of both WASM and EVM compatible virtual machines (and others in the future), you can use existing solutions to write your contracts and services using zkSNARK technologies.

Check out the libraries and repositories below that you will need to get started. All of them have good documentation, a rating on GitHub, a community of developers and are used in other projects. We recommend that you follow the guidelines and recommendations.

**Circom**

<figure><img src="/files/bnoUoNqWqKnpBJjjmI45" alt=""><figcaption><p><a href="https://github.com/iden3/circom"><strong>https://github.com/iden3/circom</strong></a></p></figcaption></figure>

Circom is a special language that can be used to write logic that will then be used to build R1CS, verification keys and more. The new version of the compiler is written in Rust. The documentation has a sufficient number of examples and step-by-step explanations of what needs to be done to create zero-knowledge logic.

**SnarkJS**

SnarkJS can be used to perform a trusted configuration ceremony, generate a verifier Solidity contract, and much more.

<figure><img src="/files/CSef2uWhl6shulsu40mT" alt=""><figcaption></figcaption></figure>

More information can be found on the official websites. Below you will see links to repositories that will help you create your own zero-knowledge project.

<figure><img src="/files/OZLvCiVtoBtG6jRxmDiB" alt=""><figcaption></figcaption></figure>

* <https://github.com/iden3/circom>
* <https://docs.circom.io/>
* <https://github.com/iden3/snarkjs>

### zkSTARK

Coming soon

## VRF - verifiable random

A verifiable random function (VRF) is a cryptographic primitive that uses a pair of keys and, based on some input data, can generate pseudo-random values ​​while also creating proof that it was calculated correctly.

This "testable randomness" can be extremely important for special use cases within services.

Only the owner of the private key can calculate the hash and proof, but anyone with the public key can verify the hash is correct and the proof is valid.

Let's imagine that a group of people (2 people) are playing a game in which everyone receives the input string <mark style="color:purple;">**THIS IS A GAME**</mark> and generates 32 byte hashes using VRF. This continues 3 times and each time the input will be the hash obtained in the previous step. After that, they sum up the hash values. Whoever has the most amount wins. Each of them has a pair of keys and each knows the public key of the other. You can visualize it like this

<figure><img src="/files/RaggTVlpkN3HOaMHr9H5" alt=""><figcaption></figcaption></figure>

At the same time, both Alice and Bob will be sure of the impossibility of obtaining other data and the fairness of this game.

### Where can it be useful and where is it applied?

Here we explained the VRF mechanism in a simplified way, but Algorand consensus works similarly.

{% embed url="<https://medium.com/algorand/algorand-releases-first-open-source-code-of-verifiable-random-function-93c2960abd61>" %}

We assume the use of VRF in smart contracts and services on KLYNTAR. Also, it's a great method for MEV-resistance or other stuff in workflows which require randomness.

## FHE - fully homomorphic encryption

<figure><img src="/files/cKMLsbx3vkmQV9WrahL5" alt=""><figcaption></figcaption></figure>

**Fully Homomorphic Encryption (FHE)** is an advanced cryptographic technique that allows computations to be performed on encrypted data without ever decrypting it. This means sensitive data can remain secure throughout the computation process, even in untrusted environments. The result of the computation is also encrypted and can be decrypted only by the data owner.

### Key Idea

FHE enables operations such as addition and multiplication on ciphertexts, preserving the structure of the original data. For example:

Let `E(x)` denote the encryption of a value `x`. In an FHE system:

* **Addition**: `E(a + b) = E(a) + E(b)`
* **Multiplication**: `E(a * b) = E(a) * E(b)`

This property makes FHE particularly useful for scenarios where privacy is critical, such as:

* **Secure Data Analysis**: Performing analytics on encrypted datasets without exposing sensitive information.
* **Cloud Computing**: Allowing cloud providers to compute on encrypted data without learning anything about the data itself.
* **Healthcare**: Enabling secure processing of medical records to preserve patient confidentiality.

By keeping data encrypted throughout the computation, FHE provides a powerful way to enhance privacy and security in the digital age.

### Where we'll use it ?

We plan to implement FHE functionality into EVM and WASM virtual machines to allow you to use them from smart contracts.

### Which implementation we'll use ?

We will use the state-of-the-art open-source solution from Zama, which created a popular repository for working with FHE. This implementation is reliable and is already used in a various of projects.

{% embed url="<https://crates.io/crates/tfhe>" %}

## And one more thing

We are interested in qualitative improvement of the crypto industry, therefore more and more new cryptographic algorithms will be constantly added for their native use on the project.

Join the open-source development!

{% embed url="<https://github.com/KlyntarNetwork>" %}


# Virtual machines - EVM, WASM, containers and much more!

## Intro

We want to expand the possibilities of writing smart contracts for our chain as much as possible, so you will have access to the capabilities of the two most popular virtual machines - EVM and WASM. And in the future, there will be more!

<figure><img src="/files/fvxEvW8WC4Rw89uN5vIZ" alt=""><figcaption></figcaption></figure>

## EVM

The most popular virtual machine that immediately gives us compatibility with many popular DApps - stablecoin contracts, DEX, marketplaces, etc. can be immediately deployed to use the capabilities of Klyntar.

It also gives us the ability to be compatible with wallets, SDKs, and other Web3 products for EVM chains

## WASM

WebAssembly bytecode can be derived from popular languages ​​such as Rust, C/C++, AssemblyScript and many more! Learn more here

{% embed url="<https://github.com/mbasso/awesome-wasm>" %}

Use the power of package managers to import functionality from npm or crates.io for use inside your smart contracts

## Containers - a game changing execution environments

Coming soon


# Parallelization

## Intro

Klyntar was created to implement best practices. That is why parallel transaction execution was implemented.

We have 4 types of transactions available below. Currently, parallel transaction execution is supported for:

<table><thead><tr><th width="274">Transaction type</th><th width="269">Description</th><th data-type="checkbox">Implementation status</th></tr></thead><tbody><tr><td><strong>TX</strong></td><td>Default address to address coins transfer</td><td>true</td></tr><tr><td><strong>WVM_DEPLOY</strong></td><td>Contract deployment to WASM vm</td><td>true</td></tr><tr><td><strong>WVM_CALL</strong></td><td>Call smart-contract in WASM vm</td><td>true</td></tr><tr><td><strong>EVM_CALL</strong></td><td>Interaction with EVM</td><td>true</td></tr></tbody></table>

In the interface of explorer you can see the **execution type** of transaction. This is example of parallel transaction:

<div data-full-width="false"><figure><img src="/files/vadGjXmYuCShFG9LSnC2" alt=""><figcaption></figcaption></figure></div>

And this transaction is not parallel - it was executed in a sync way

<div data-full-width="false"><figure><img src="/files/UTpl0H1xGOAVO7BqvjjV" alt=""><figcaption></figcaption></figure></div>

## Parallel execution for native transactions and WASM vm

See  [Transfer coins between EVM and native environment](/web1337/transactions-and-smart-contracts/transfer-coins-between-evm-and-native-environment#transfer-coins-from-native-kly-environment-to-evm)

## Parallel execution for EVM

See [Transfer coins between EVM and native environment](/web1337/transactions-and-smart-contracts/transfer-coins-between-evm-and-native-environment#transfer-coins-from-evm-to-native-kly-environment)


# Abstractions - for account, storage and chain

## Intro

<figure><img src="/files/EMD5VOVF78midmvGYRiu" alt=""><figcaption></figcaption></figure>

Abstraction has a big role as it allows you to move away from predefined functionality and expand it, improving UX (user eXperience) 🔼

In an effort to improve our services and give you new opportunities, we present 3 types of abstractions that will be available on the platform 👇:

## 1. Account abstraction 2.0 🟢 - pay for gas in any token on any chain

Extension to use everything what has a value as a fee. Execute smart-contracts or average address-address transactions by paying fees in memecoins, stablecoins or any other asset. Any chain, any asset.

## 2. Storage Abstraction 🟢

Extension to make storage usage fair. This mechanism forces contract creators to pay for storage used by their contracts. Good solution for long-term storage use planning - for users & validators

## 3. Chain Abstraction 🟠

Abstract the cross-chain experience by building multichain DApps, execute txs on multiple chains from our chain and so on! Inspired by Near 🤖


# RWX - codeless smart contracts for real world usage

TODO


# Unique shared security model

Coming soon

## Usage

See details here

{% content-ref url="/pages/fuIl6xzBZfIwicOBFjMN" %}
[Shared security usage](/shared-security-usage/for-blockchain-networks)
{% endcontent-ref %}


# Mutations - add new functionality and improvements simple and fast

Coming soon


# Forgetfulness - a blockchain cleaning mechanism

## Intro

TODO

## Cleaning blockchain history after checkpoints to hostchains

TODO

## Few words about "how to store my data onchain permanently"

TODO


# Low validator requirements and mobile validation


# AI layer


# Quantum future


# Bring your social value to alternative economy


# Ecosystem & Future services


# Official links

## General links

1. Site - [https://klyntar.org](https://klyntar.org/)
2. Explorer (Mainnet) - [https://www.klyntarscan.org](https://www.klyntarscan.org/)
3. Explorer (Testnet)  - [https://www.testnet.klyntarscan.org](https://www.testnet.klyntarscan.org/)
4. Brand assets -  <https://klyntar.org/branding>
5. Privacy policy - <https://klyntar.org/privacy-policy>
6. Telegram bot for RWX - codeless smart contracts (dispute resolution) - <https://t.me/klyn74rbot>

## Social media

1. X(formerly Twitter) - <https://x.com/KlyntarNetwork>
2. Discord - <https://discord.com/invite/f7e7fCp97r>
3. Github - <https://github.com/KlyntarNetwork>
4. Telegram Channel - [https://t.me/KlyntarNetwork](https://t.me/KlyntarNetworkChat)
5. Telegram Community Chat - <https://t.me/KlyntarNetworkChat>&#x20;
6. Medium - [https://klyntar.medium.com](https://klyntar.medium.com/)
7. Reddit - <https://www.reddit.com/r/KlyntarNetwork>
8. Instagram - <https://www.instagram.com/klyntarnetwork>


# Brand assets

## Link

All list of brand assets - fonts, colors, gradients, logos available on our site:

{% embed url="<https://klyntar.org/branding>" %}


# Partnerships

If you want to cooperate with us - please contact us by email&#x20;

[**`hello@klyntar.org`**](mailto:hello@klyntar.org)

Or via Telegram bot

[**`@klyntar_support_bot`**](https://t.me/klyntar_support_bot)

We will be glad to receive your letters :relaxed:


# Tokenomics

## Intro

Tokenomics is an important document for any crypto project as it helps to understand the potential of the coin from a financial point of view, helps to estimate the percentage of increase in emission and predict the price.

Below we present you a detailed description of our tokenomics. **Research and remember** - <mark style="color:red;">**D Y O R**</mark> (<mark style="color:red;">**D**</mark>o <mark style="color:red;">**Y**</mark>our <mark style="color:red;">**O**</mark>wn <mark style="color:red;">**R**</mark>esearch).

It is also worth clarifying - below are only general charts (in the form of pictures), so we strongly recommend studying tokenomics by simply visiting the Google spreadsheet:

{% hint style="info" %}
<https://docs.google.com/spreadsheets/d/1LBnIlYddr4F9U4Gi1z8ZJ-4szjEbUf8DK9RyES_mv7c/edit?usp=sharing>
{% endhint %}

## General&#x20;

We start with the most general chart that will show how much percentage each side of the project receives

<figure><img src="/files/5UPy6ELv2hYeKwd4al7b" alt=""><figcaption></figcaption></figure>

## Allocation accumulation over the time

The second chart shows what total percentage each side has over the time

<figure><img src="/files/5LtRZ83TpotA26tNpAU1" alt=""><figcaption></figcaption></figure>

## Allocation per month

The last diagram shows the percentage of coins that will be created in the system each month, as well as the shares that will be distributed between the parties - the team, investors and of course - the community

<figure><img src="/files/4jh561FUvAxXlLzRrS4b" alt=""><figcaption></figcaption></figure>


# Glossary & Taxonomy

Terms and abbreviations that you will meet


# Our repositories and codebase

## Klyntar core

The core of cryptocurrency. The main repository

{% embed url="<https://github.com/KlyntarNetwork/KlyntarCore>" %}

## Web1337

SDKs to work with the KLY network - send transactions, generate accounts, call APIs, interact with smart-contracts and much more!

{% embed url="<https://github.com/KlyntarNetwork/Web1337>" %}

{% embed url="<https://github.com/KlyntarNetwork/Web1337Golang>" %}

{% hint style="info" %}
We'll also add the links to SDKs for other languages
{% endhint %}

## Klyntar Explorer

{% embed url="<https://github.com/KlyntarNetwork/Explorer>" %}


# Architecture

## Mode 1

## Mode 2


# Types of transactions

## TX

Average address to address transaction

## WVM\_DEPLOY

Transaction with deployment WASM smart-contract to native Klyntar environment (to WASM virtual machine)

## WVM\_CALL

Transaction to call WASM vm smart-contract

## EVM\_CALL

Transaction with interaction with EVM. Might be address to address transaction or contract call


# Types of accounts

## User accounts

### 1. Ed25519

1. 32-bytes, Base58 encoded
2. Looks like Solana address

**Examples:**

1. `6XvZpuCDjdvSuot3eLr24C1wqzcf2w4QqeDh9BnDKsNE`
2. `9GQ46rqY238rk2neSwgidap9ww5zbAN4dyqyC7j5ZnBK`
3. `GUbYLN5NqmRocMBHqS183r2FQRoUjhx1p5nKyyUBpntQ`

### 2. BLS

1. 48-bytes, hex-encoded, 0x-prefixed

**Examples:**

1. `0x8f079049121d5e2ae885bdc6581df9fb68eab94a7aa3ae54bfe1d1ac35aceefbb202f656b0c1b56d64583630612a9970`
2. `0xb2ec32c9d7216163790ba3628a6a6b5a12db457c933b1f4627775b6dae468636233c6ad9931a8ef848a58353e60d33dd`

### 3. TBLS

1. 48-bytes, hex-encoded, looks like BLS but <mark style="color:red;">**without**</mark> **0x**-prefix. Rootkey for the whole group

**Examples:**

1. `b2ec32c9d7216163790ba3628a6a6b5a12db457c933b1f4627775b6dae468636233c6ad9931a8ef848a58353e60d33dd`

### 4. PQC - Post quantum accounts

1. 32-bytes, hex-encoded, BLAKE3 hash of post-quantum pubkey

**Examples:**

1. `4218fb0aaace62c4bfafbdd9adb05b99a9bf1a33eeae074215a51cb644b9a85c`

Check yourself:

1. The pubkey is&#x20;

   ```json
   0012d71baf1524047e13c5006d00cf0cc3123e0ffe00941dda123a1c1806b50d261b660da60414067b13220793131b1d87099d0571175e0884092512c80d4308ab074e090502220c3519001ac10aad1126085e1c270cf815dc10dc04b508931a870b6619e0067e10cf0a7f1c3b04841452174400fc08ed0507040d1d39176b025b06d317e90057145017090e3907201dd50818020e0e74003504400a1a182c14f609f6117902981367191104050add14bd0b031af10c3e02a1160003011a5b137d00c8167b04521c4b1b9016250aeb01b7038d10a818da144406c91bca1b33195e0fd20930193e0dfa11f20f340da50b1215b51d21197c11060de009eb0c8201fb14110be00ec503bd065207a70953132d1a38115b153507da0a3e01290c8016af1d2c18a417100c1508cc112f146a130c013b014704471dbc02c20038013415621985124419ae10a501170eb70e6d0b220ee405ef17ff1c9b0dce0a1f07a204cf1b7b18b9013a0bdc00af187d169e050e0c201b5915c709b011db11170b06159b1cbe03691d860d00028d187d0e61074a1673027a047f16281bac0cfd09a00a62050c07ee1058020e006407de0adc1036136b10b417eb1b12155919b105f60b1d0bde0a57127b0007087d150c11690b7800930f1e16ec19ac0b8d1d7e1b0f02321c90148d1a47075a091113c9159e051113b403b5063001d3186e13b211c70d20
   ```
2. The formula is:

$$
BLAKE3(pubkey) = 4218fb...
$$

### 5. EVM compatible account

1. 20-bytes, hex-encoded, 0x-prefixed, looks like Ethereum address

**Examples:**

1. `0x407d73d8a49eeb85d32cf465507dd71d507100c1`
2. `0x069bdf66961ce2D38eBe48DD2E095f2c8015ac82`

## Contract accounts

### 1. WASM contract account ID

1. 32-bytes, hex-encoded, 0x-prefixed

**Examples:**

1. `0x0000000000000000000000000000000000000000000000000000000000000000`
2. `0x8f079049121d5e2ae885bdc6581df9fb68eab94a7aa3ae54bfe1d1ac35aceefb`&#x20;

### 2. EVM contract account ID

1. 20-bytes, hex-encoded, 0x-prefixed, looks like Ethereum address

**Examples:**

1. `0x1000000000000000000000000000000000000007`
2. `0x9f8E68B1974069B854eE481deC0819697B901f1D`&#x20;


# Virtual machines

## KLY-EVM

EVM compatible virtual machine by KLY. Supports low-level sharding, WASM(it's possible to call WASM from EVM and vice versa) and other features like storage-by-subscription model, free calls, advanced fee system, etc.

## KLY-WVM

WASM-based virtual machine by KLY. Supports several languages, EVM(call EVM from WASM), sharding,etc.

## XVM

Hybrid virtual machine with multiple architectures support:

* EVM
* WASM
* Other(later - Solana VM, Cosmos VM, etc)

## Smart contract

## Bytecode

## Cross contract call

## Cross VM call


# Consensus

## FP - Finalization Proof

Signature by some quorum member (validator) that told:

> I agree to vote for block <mark style="color:red;">**B**</mark> with index <mark style="color:green;">**I**</mark> and hash <mark style="color:purple;">**H**</mark> created by shard leader <mark style="color:orange;">**L**</mark>. The previous block hash was <mark style="color:blue;">**P**</mark>

On a more technical level - the validator that is part of the current quorum when receiving a block proposal from the shard leader generates a signature:

```javascript
import {crypto} from 'web1337';

let prevBlockHash = "b5d6a3736a146fe921e40be95b8e41a0f953a20aedb740769440be4b53795ff7";

let blockID = "0:9GQ46rqY238rk2neSwgidap9ww5zbAN4dyqyC7j5ZnBK:1618";

let blockHash = "36514c7acfd77950b23baced61f70bd7126f5dac4bc7f2eb110f364123901c42";

// Epoch Full ID = epoch.hash+"#"+epoch.index
// Just concat hash + # + index
let epochFullID = "0123456789abcdef0123456789abcdef0123456789abcdef0123456789abcdef#0";

let dataThatShouldBeSigned = prevBlockHash+blockID+blockHash+epochFullID;


// Imagine that validator holds it locally
let quorumValidatorPrivateKey = "MC4CAQAwBQYDK2VwBCIEILdhTMVYFz2GP8+uKUA+1FnZTEdN8eHFzbb8400cpEU9";


let finalizationProof = await crypto.ed25519.signEd25519(dataThatShouldBeSigned,quorumValidatorPrivateKey);
```

After quorum member generate this signature - it can be handled(by someone - since it proof is public) and aggregated to get the **AFP - aggregated finalization proof**

## AFP - Aggregated Finalization Proof

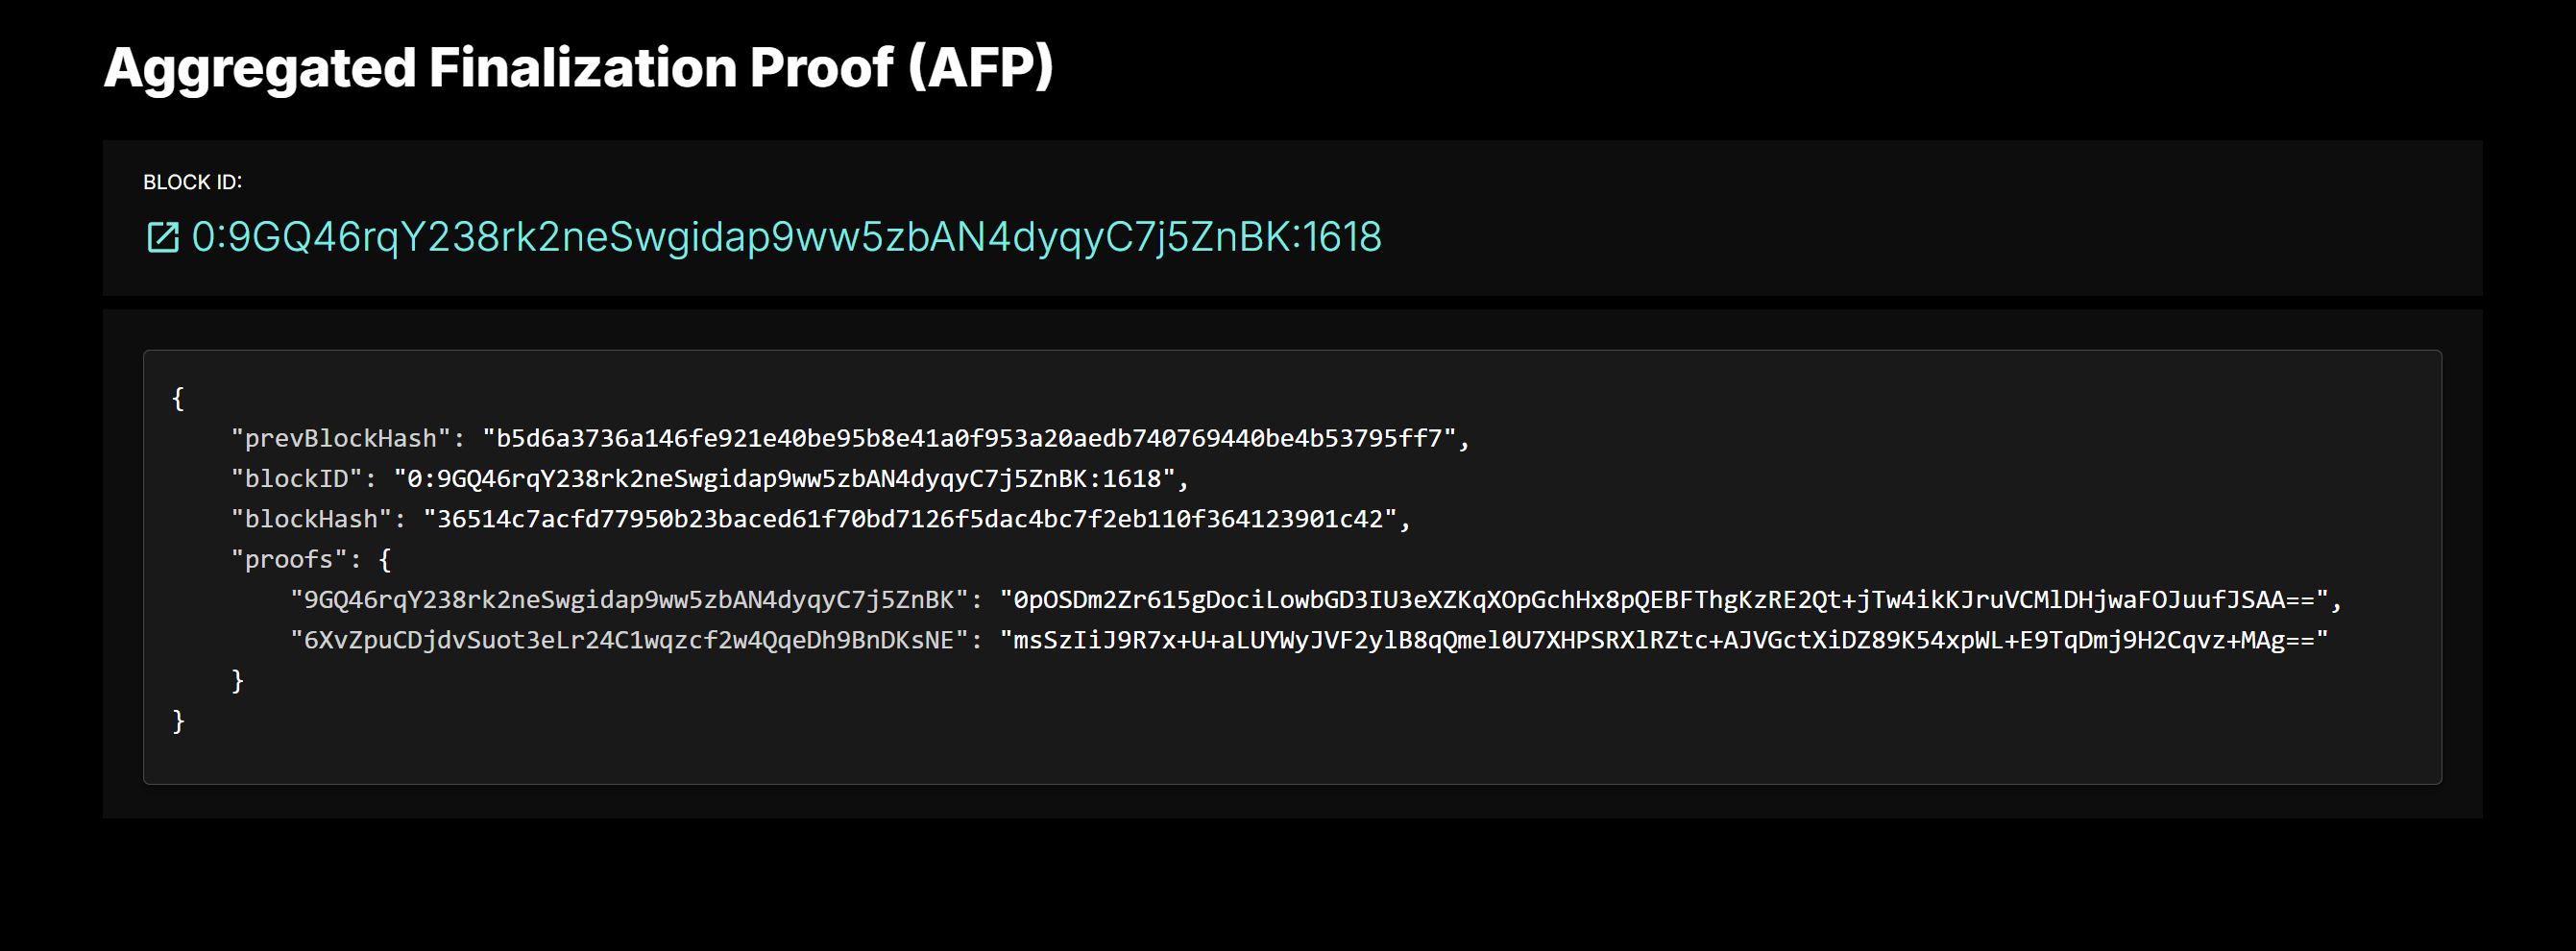
Aggregation of 2/3N of FPs gives us AFP. This is how it looks like:

```json
{
    "prevBlockHash": "b5d6a3736a146fe921e40be95b8e41a0f953a20aedb740769440be4b53795ff7",
    "blockID": "0:9GQ46rqY238rk2neSwgidap9ww5zbAN4dyqyC7j5ZnBK:1618",
    "blockHash": "36514c7acfd77950b23baced61f70bd7126f5dac4bc7f2eb110f364123901c42",
    "proofs": {
        "9GQ46rqY238rk2neSwgidap9ww5zbAN4dyqyC7j5ZnBK": "0pOSDm2Zr615gDociLowbGD3IU3eXZKqXOpGchHx8pQEBFThgKzRE2Qt+jTw4ikKJruVCMlDHjwaFOJuufJSAA==",
        "6XvZpuCDjdvSuot3eLr24C1wqzcf2w4QqeDh9BnDKsNE": "msSzIiJ9R7x+U+aLUYWyJVF2ylB8qQmel0U7XHPSRXlRZtc+AJVGctXiDZ89K54xpWL+E9TqDmj9H2Cqvz+MAg=="
    }
}
```

In our explorer you can check the AFP on the block page - look at the link next to the status

<figure><img src="/files/qFbpVpYtLtv5jh047tUA" alt=""><figcaption></figcaption></figure>

Clicking on the link will show you the raw version of AFP:

<figure><img src="/files/hoRM8gl3SLVNozMH3B5g" alt=""><figcaption></figcaption></figure>

Probably the most interesting field here is `proofs` - these are just the FP's from the validators that are part of the quorum of the epoch when the block was generated.

You can verify it yourself using this code:

```javascript
import {crypto} from 'web1337';

let prevBlockHash = "b5d6a3736a146fe921e40be95b8e41a0f953a20aedb740769440be4b53795ff7";

let blockID = "0:9GQ46rqY238rk2neSwgidap9ww5zbAN4dyqyC7j5ZnBK:1618";

let blockHash = "36514c7acfd77950b23baced61f70bd7126f5dac4bc7f2eb110f364123901c42";

// Epoch Full ID = epoch.hash+"#"+epoch.index
// Just concat hash + # + index
let epochFullID = "0123456789abcdef0123456789abcdef0123456789abcdef0123456789abcdef#0";

let dataThatShouldBeSigned = prevBlockHash+blockID+blockHash+epochFullID;

// Let verify FP for quorum member 9GQ46rqY238rk2neSwgidap9ww5zbAN4dyqyC7j5ZnBK

let quorumMember = "9GQ46rqY238rk2neSwgidap9ww5zbAN4dyqyC7j5ZnBK";
let fpProof = "0pOSDm2Zr615gDociLowbGD3IU3eXZKqXOpGchHx8pQEBFThgKzRE2Qt+jTw4ikKJruVCMlDHjwaFOJuufJSAA==";


let isFinalizationProofOk = await crypto.ed25519.verifyEd25519(dataThatShouldBeSigned,fpProof, quorumMember);

// In case 2/3N+1 of quorum created valid FPs - then this AFP is valid
```

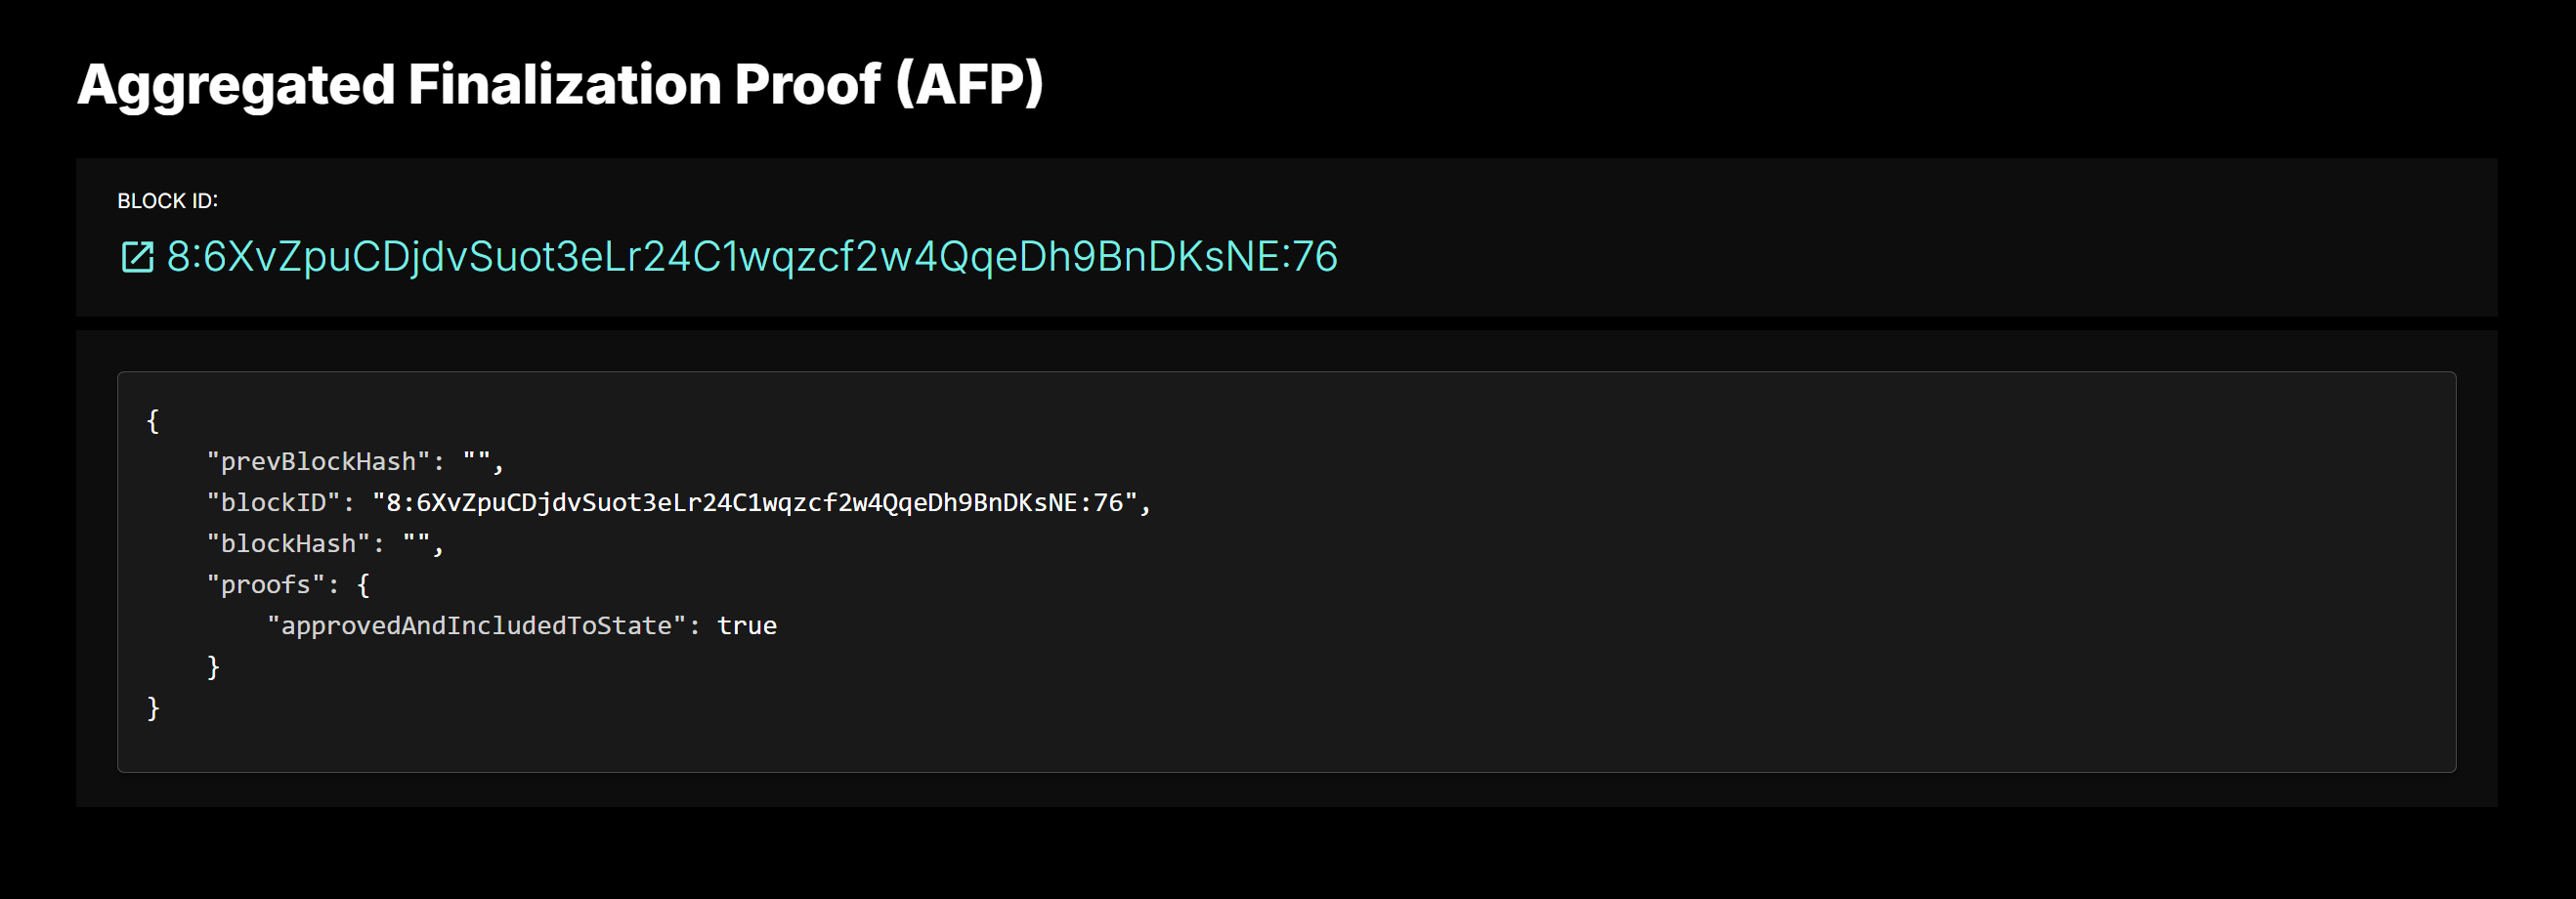
Sometimes, another case is also possible:

<figure><img src="/files/7qvX35GvwuLLLb274ilF" alt=""><figcaption></figcaption></figure>

{% hint style="info" %}
If you see something like this in the explorer, it means that the network has finished the epoch on this block. This block is also valid and was included in the state, but indirectly - via the process of voting for ending of epoch. Such AFP is impossible to verify and it used just as a stub for user interface of explorer
{% endhint %}

## LRP - Leader Rotation Proof

Signature by some quorum member (validator) that told:

> I agree to finish FPs generation for shard leader <mark style="color:orange;">**L**</mark> on index <mark style="color:red;">**I**</mark> and hash <mark style="color:purple;">**H**</mark>. The hash of first block by this leader is <mark style="color:green;">**F**</mark>

## ALRP - Aggregated Leader Rotation Proof

Aggregation of 2/3N of LRPs gives us ALRP. This is how it looks like:

```json
{
    "firstBlockHash": "a2d375da65094d65d25cc449abd10dfcea6c1b011cd0ce190379ca09b82b842b",
    "skipIndex": 131,
    "skipHash": "fb963df17e1b7f437636e4c5c94b32d43b86049393bafdf01299a304511c59eb",
    "proofs": {
        "9GQ46rqY238rk2neSwgidap9ww5zbAN4dyqyC7j5ZnBK": "W4Otr1LGk5KVYYBp+10hi3n2l+iVyNc+BgLYh3Yi4JEGiBG+MlozqSk4RjWu638ccAkeaebk6IhgmNKu8R9zAw=="
    }
}
```

## EFP - Epoch Finalization Proof

Signature by some quorum member (validator) that told:

> I agree to finish epoch <mark style="color:red;">**X**</mark> on shard <mark style="color:purple;">**Y**</mark>. The last shard leader had index <mark style="color:green;">**Q**</mark> in leaders sequence. His last block has height **W** and hash <mark style="color:yellow;">**H**</mark>. His first block has hash <mark style="color:orange;">**F**</mark>

## AEFP - Aggregated Epoch Finalization Proof

Aggregation of 2/3N of EFPs gives us AEFP. This is how it looks like:

```json
{
  
    "lastLeader": 2,
    "lastIndex": 31,
    "lastHash": "ab963df17e1b7f437636e4c5c94b32d43b86049393bafdf01299a304511c59eb",
    "hashOfFirstBlockByLastLeader": "b2d375da65094d65d25cc449abd10dfcea6c1b011cd0ce190379ca09b82b842b",
    "proofs": {
        "9GQ46rqY238rk2neSwgidap9ww5zbAN4dyqyC7j5ZnBK": "W4Otr1LGk5KVYYBp+10hi3n2l+iVyNc+BgLYh3Yi4JEGiBG+MlozqSk4RjWu638ccAkeaebk6IhgmNKu8R9zAw=="
    }
}
```


# RWX codeless smart contracts

## RWX contract

RWX - Real World eXecution codeless smart contracts.


# Wallets to work with WVM and native environment


# EVM compatible wallets

## Add Klyntar testnet to wallets

1. Network ID - 73317331
2. RPC - <https://rpc.testnet.klyntarscan.org>

## Add Klyntar mainnet to wallets

1. Network ID - 7331
2. RPC - <https://rpc.mainnet.klyntarscan.org>


# Build the core

Install required dependencies first

## 1. Golang installation

<figure><img src="/files/kCD3DoB8Lxiv2qmpLMPq" alt=""><figcaption></figcaption></figure>

First part of Klyntar is written using Go language, so you need to install it. Use this guide to install Golang for your platform & architecture

{% embed url="<https://go.dev/doc/install>" %}

Or, check if you already have Go

```sh
go version
```

## 2. Node.js installation

<figure><img src="/files/hSth7B6wGJV64JdxRrzr" alt=""><figcaption></figcaption></figure>

Part of core is written on Node.js so you should to install it. If you already have installed, we recommend checking the version. The recommended version is **v21.4.0**

{% tabs %}
{% tab title="Linux" %}

```sh
johndoe@klyntar:~$ node -v
v21.4.0
```

{% endtab %}

{% tab title="Windows" %}

```sh
C:\Users\JohnDoe>node -v
v21.4.0
```

{% endtab %}
{% endtabs %}

Use official guides to install Node.js for your platform (Windows/Linux/Mac)

{% embed url="<https://nodejs.org/en/download/package-manager>" %}

## 3. PNPM installation

<figure><img src="/files/DVoNjLpmqdZys4zWlmmL" alt=""><figcaption></figcaption></figure>

As a package manager for Node.js we use pnpm. To install it globally, run:

```sh
npm install -g pnpm
```

## 4. PM2 for production process management installation

<figure><img src="/files/i5UlYG7QhKgJN7hBtAKO" alt=""><figcaption></figcaption></figure>

PM2 is a production process manager for Node.js applications with a built-in load balancer. It allows you to keep applications alive forever, to reload them without downtime and to facilitate common system admin tasks.

**You can install it globally using the command:**

```sh
npm install pm2 -g
```

{% embed url="<https://www.npmjs.com/package/pm2>" %}

PM2 allows you to manage and monitor a node/validator in production mode. So, you can simply start the node/validator via PM2 to:

1. Run the node as a background service - so you can close the console, close the SSH connection to server and node will work on background
2. Have access to logs stream to monitor node status

Here are some useful commands

```
pm2 start <service_name> - to start the core as background service
pm2 stop <service_name> - to stop the core
pm2 monit <service_name> - start console dashboard with logs, memory usage, etc.
pm2 logs <service_name> - start logs stream
pm2 logs <service_name> --lines <x> --nostream - read last X lines of logs from error stream and normal logs stream
```


# Build process

## Milestone before continue

At this point you should already have installed:

1. Golang
2. Node.js
3. PNPM
4. PM2

{% hint style="success" %}
**If so, continue, if not, return to the previous page** :wink:
{% endhint %}

## Next step - clone the core repository&#x20;

Use it via GitHub

```sh
git clone https://github.com/KlyntarNetwork/KlyntarCore.git

cd KlyntarCore
```

Now depending on your OS run the following commands:

## Install dependencies

```sh
pnpm install
```

## Link core to make it available from any location

```sh
npm link
```

## Build Golang addons

Run a simple script

{% tabs %}
{% tab title="Unix" %}

```bash
chmod 700 build_must_have_addons.sh

./build_must_have_addons.sh
```

{% endtab %}

{% tab title="Windows" %}

```sh
build_must_have_addons.bat
```

{% endtab %}
{% endtabs %}

## Build KLY-EVM

{% tabs %}
{% tab title="Unix" %}

```sh
cd KLY_VirtualMachines/kly_evm

pnpm install

chmod 700 build_kly_evm.sh

./build_kly_evm.sh
```

{% endtab %}

{% tab title="Windows" %}

```sh
cd KLY_VirtualMachines\kly_evm

pnpm install

build_kly_evm.bat
```

{% endtab %}
{% endtabs %}

## Return to main directory

```sh
cd ../../

// Linux/Mac only
chmod 700 klyntar_core.js
```

{% hint style="success" %}
**At this stage, the build process ends and the preparation of files for work begins**
{% endhint %}

## Prepare configuration and genesis files

Depending on the network you want to connect to, you will need an appropriate genesis file, as well as a set of configurations for your node.

To find the files that suit you, follow the instructions in the section [**Networks**](/build-core-and-join-network/networks)

1. [Setup testnet node](/build-core-and-join-network/networks/testnet/public-testnets/setup-testnet-node)
2. [Setup mainnet node](/build-core-and-join-network/networks/mainnet/setup-mainnet-node)


# Networks

## Mainnet

Mainnet is the most important network with real coins, smart-contracts, accounts and so on

{% embed url="<https://klyntarscan.org/>" %}

## Testnet

Testnet is your playground for testing transfers, deploying smart-contracts, interaction with contracts and so on

{% embed url="<https://testnet.klyntarscan.org/>" %}

## Devnet

Devnet is a network for developers(team) - it is completely controlled by the Klyntar team and is used for local development, testing new features, etc.

**It can be rebooted at any time**

{% embed url="<https://devnet.klyntarscan.org/>" %}


# Testnet


# Your own private testnet


# Netrunner

## Intro

Netrunner is a specialized tool for quickly launching a testnet. Literally using a couple of commands, you can deploy a local network of different sizes in order to:

1. Test smart contracts
2. Test system operations (staking, voting, etc.)
3. Improve the core code and instantly test your changes. Debug, etc.

## Currently supported configurations:

{% hint style="info" %}
The notation **Vx** means number of validators and size of network
{% endhint %}

1. V1 - testnet with a single validator
2. V2 - testnet with 2 validators
3. V5 - testnet with 5 validators
4. V21 - testnet with 21 validators

## Where to get it ?

Go to repository page and follow installation instructions in README

{% embed url="<https://github.com/KlyntarNetwork/NetRunner>" %}


# Netrunner and PM2

## Using PM2 for production management

<figure><img src="/files/LDFU6DNPAGG7FyYa2wRk" alt=""><figcaption></figcaption></figure>

PM2 allows you to run services in the background, monitor server resource usage, write logs, and more.

{% hint style="info" %}
**PM2 is the recommended way to run and maintain a node (regular and validator) for Klyntar**
{% endhint %}

To run & work with a testnet you can use these simple commands:

## 1. Start a testnet in a single command:

```
pm2 start runner2.js
```

## 2. Check the active background services

You will see the following

<figure><img src="/files/7m0XOT2ApWGAiaAomT4y" alt=""><figcaption></figcaption></figure>

## 3. Enter monitoring dashboard

```
pm2 monit runner2
```

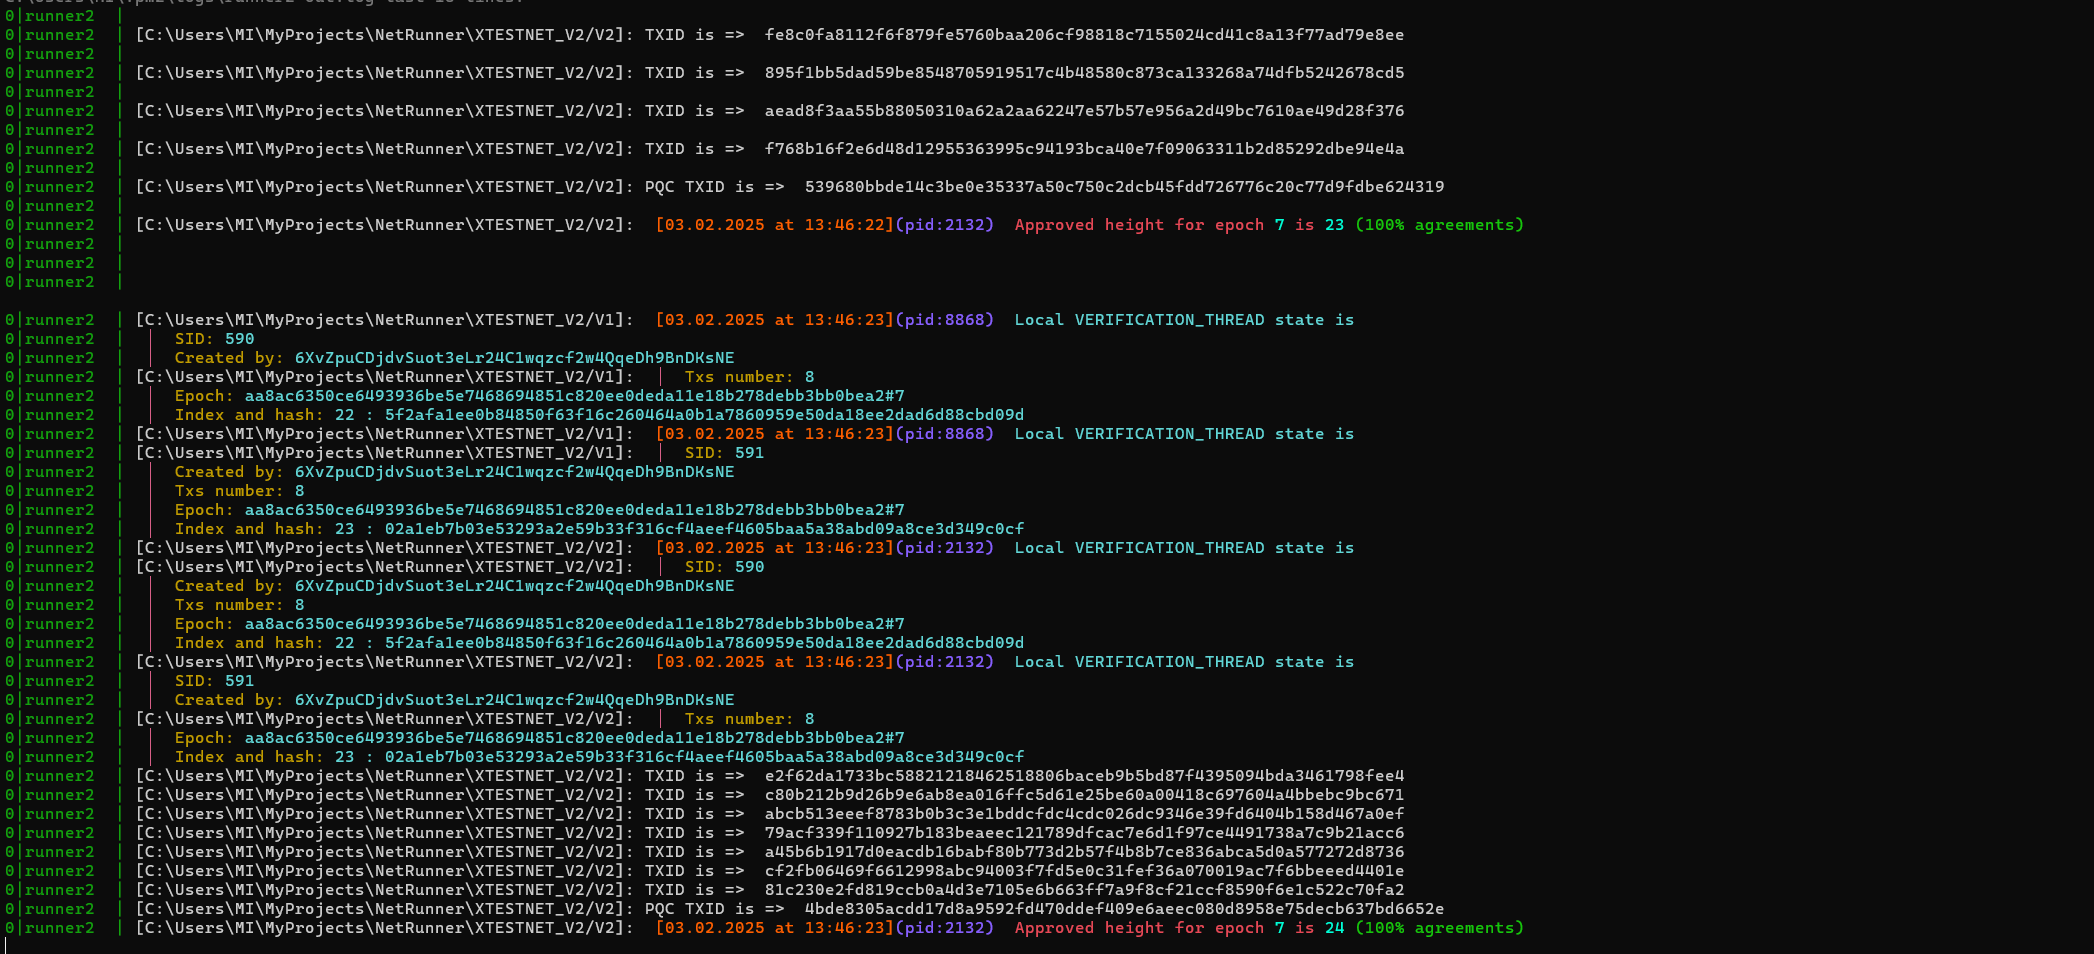
<figure><img src="/files/jwo5HQPTRMiw4vG57Xr1" alt=""><figcaption></figcaption></figure>

## 4. Read the logs stream

```
pm2 logs runner2
```

<figure><img src="/files/nNXlVppOWJOZR51meKho" alt=""><figcaption></figcaption></figure>

## 5. Read last N lines of logs from stdout / stderr streams (`nostream` mode)

```
pm2 logs --lines <N> --nostream runner2
```

{% hint style="info" %}

#### Reading logs available even if the service was stopped - so it's useful to understand reasons of downtimes and so on

{% endhint %}

## 6. Stop a testnet

```
pm2 stop runner2
```

{% hint style="info" %}

#### When you stop the testnet and then run it again - the progress will be dropped and testnet will start from height 0 and epoch 0

{% endhint %}


# Public testnets

## Links

{% embed url="<https://testnet.klyntarscan.org>" %}


# Testnet faucets

When working in a testnet, test coins are needed. Go to our faucet on the website and follow the necessary simple steps to get test coins to your EVM address:

{% embed url="<https://klyntar.org/testnet-faucet>" %}

Also, a short demo can help you:

{% embed url="<https://youtu.be/z2xbqrYN9KE>" %}


# Setup testnet node

## Prepare configuration and genesis

## Sync your node

## What next ?


# Mainnet

## Links

{% embed url="<https://www.klyntarscan.org>" %}


# Setup mainnet node

## Prepare configuration and genesis

## Sync your node

## What next ?

{% content-ref url="/pages/RlpEBpUPRnbG7n1KXqfB" %}
[Become a validator](/build-core-and-join-network/become-kly-validator)
{% endcontent-ref %}

{% content-ref url="/pages/Ce9jAOoetrCVCgeIrmFO" %}
[Default staking](/build-core-and-join-network/staking/default-staking)
{% endcontent-ref %}

{% content-ref url="/pages/Ttelg9GSaE1IK0j2YcoQ" %}
[Multichain multiasset staking](/build-core-and-join-network/staking/multistaking)
{% endcontent-ref %}


# Staking


# Default staking


# Staking

## Intro

The staking process in crypto projects is very important because it allows you to attract more independent parties to maintain the decentralization of the network.

Obviously, not everyone is able to put a large amount to launch a validator, and not everyone has the necessary technical skills to maintain a validator (it is still a server) - update it, work with the cloud, and so on.

Staking gives you the opportunity to put your coins on those who can maintain a server, and in return - the validator will share with you part of the profit from the network.

Below we will demonstrate the staking process.

## Find validator(staking pool) to stake on

First of all - search for the staking pool (validator) you want to stake on.

You have several ways to do this:

1. Own data channels - this can be your own pool, some large staking provider (for example Everstake or staking by some top-tiers exchanges).
2. Search on our resources - you can find a staking pool in the explorer and select it for staking

Visit the main page of explorer and choose `Epoch data`

<figure><img src="/files/sXDGeZCm79R87YG0SvZc" alt=""><figcaption></figcaption></figure>

Now below you should see the list of leaders on shards for current epoch:

<figure><img src="/files/i16z39sbhblJYaMbWtHy" alt=""><figcaption></figcaption></figure>

By clicking on a specific validator you will be redirected to a page with information about it.

<figure><img src="/files/SViojKFeXav7X2vY5Q6V" alt=""><figcaption></figcaption></figure>

Below is a list of stakers of this pool. For example, for this pool, only the owner himself is a staker. The total strength of the pool is 55,000 KLY, while the owner has staked all 55,000 KLY

<figure><img src="/files/9u8ZgcgyPximOM4xiuyq" alt=""><figcaption></figcaption></figure>

However, using this pool as an example, we will demonstrate the staking process below.

## Method 1 - via user interface

The easiest way is to go to our website, connect your wallet and start the staking process in a special form

<figure><img src="/files/GyhLPpk2S3e1EC8GMgfN" alt=""><figcaption></figcaption></figure>

Click **`Select Wallet`** and choose your provider (Metamask, Coinbase Wallet, OKX Wallet, etc.)

<figure><img src="/files/QcIAqEM4xs0Vns9c7EWt" alt=""><figcaption></figcaption></figure>

<figure><img src="/files/BJlEdpQAtHlgZzJGPSPf" alt=""><figcaption></figcaption></figure>

Metamask shows us that we have 200 coins on balance

<figure><img src="/files/XyxtmMeukL06gm5IoyqK" alt=""><figcaption></figcaption></figure>

After connecting the wallet, select the desired account from the list

<figure><img src="/files/SVrSRpMcezRQIoGJWmcD" alt=""><figcaption></figcaption></figure>

Select the number of coins you want to stake and select the pool

<figure><img src="/files/V7erJy9cMnYC3vK19LUO" alt=""><figcaption></figcaption></figure>

If we visit the page of pool before the transaction, we'll see that currently pool has only one staker - it's pool owner itself

<figure><img src="/files/xenJ3DIfHMQ5qdz7PbjI" alt=""><figcaption></figcaption></figure>

Initiate the transaction

<figure><img src="/files/PmDA4JuBbjVuRjHX7H5o" alt=""><figcaption></figcaption></figure>

After this, you should see the decreased balance

<figure><img src="/files/BWdDc2HXXKLLb8LbWxeF" alt=""><figcaption></figcaption></figure>

If we open the transaction details - it's possible to copy the transaction ID

<figure><img src="/files/yJu1f6dk5eeO7Lfk7Q1U" alt=""><figcaption></figcaption></figure>

Let's visit the explorer and try to find our transaction

<figure><img src="/files/y301hMYRF41RM7yiOFO5" alt=""><figcaption></figcaption></figure>

<figure><img src="/files/tNiIlv6VxRDuuzC8CTYa" alt=""><figcaption></figcaption></figure>

### When your stake will be activated ?

Please note that the stake will not be activated immediately, but only after **3 epochs**

{% hint style="info" %}
Check the duration of epoch on the main page of explorer
{% endhint %}

<figure><img src="/files/qhOy84bo2KdqeAIzrhQU" alt=""><figcaption></figcaption></figure>

Look at the block ID in which your staking transaction was located. The first part of the ID stands for the epoch ID. In this case, it is **3**.

<figure><img src="/files/MzlzIU4VD8diSPPQRLPv" alt=""><figcaption></figcaption></figure>

Therefore, your stake will be activated in epoch:

$$
ActivationEpoch = 3+3 = 6
$$

After waiting for epoch **6** - let's go to the page of the validator we stake on:

<figure><img src="/files/j4KQMuNoX4FMHYZWwrBx" alt=""><figcaption></figcaption></figure>

<figure><img src="/files/87kK1e2zNvJuO8Vwcydo" alt=""><figcaption></figcaption></figure>

<figure><img src="/files/HEAvi8Uq7jMLSwGWxbiV" alt=""><figcaption></figcaption></figure>

Now your account will be in the list of stakers and you will be able to see the reward for this epoch

## Method 2 - programmatic way using SDK

### 1. Prepare your account

Imagine that you have some keypair of your account. Definitely you should have some coins on this address to stake

```javascript
let keypair = {

    pub:"3JAeBnsMedzxjCMNWQYcAXtwGVE9A5DBQyXgWBujtL9R",

    prv:"MC4CAQAwBQYDK2VwBCIEIDteWfNev7NOlNmwP8Irwg5miWKoErYGV+UU5VrFgYev"

};
```

For example, this account have `20M` KLY

<figure><img src="/files/GWpKrTZvy8fA9syTu4NF" alt=""><figcaption></figcaption></figure>

### 2. Create the transaction to call staking system smart contract

Now use the Web1337 [**SDK**](/web1337/web1337-intro) to create the special transaction which calls system smart contract related to staking

```javascript
import Web1337 from 'web1337';

let web1337 = new Web1337({

    chainID:'aaaaaaaaaaaaaaaaaaaaaaaaaaaaaaaaaaaaaaaaaaaaaaaaaaaaaaaaaaaaaaaa',
    workflowVersion:0,
    nodeURL: 'http://localhost:7332' // or your node URL

});


// This is your keypair

let keypair = {

    pub:"3JAeBnsMedzxjCMNWQYcAXtwGVE9A5DBQyXgWBujtL9R",

    prv:"MC4CAQAwBQYDK2VwBCIEIDteWfNev7NOlNmwP8Irwg5miWKoErYGV+UU5VrFgYev"

};


const shardID = "shard_0";

const poolToStakeOn = "9GQ46rqY238rk2neSwgidap9ww5zbAN4dyqyC7j5ZnBK";

const amountToStake = 100;


let payload = {

    shard: shardID,

    contractID:'system/staking',

    method:'stake',

    gasLimit:0,

    params:{

        poolPubKey:poolToStakeOn,
        amount: amountToStake

    },

    imports:[]

};


const fee = 2;

const nonce = await web1337.getAccount(shardID,keypair.pub).then(account=>account.nonce+1);

const txType = "WVM_CALL";

let tx = web1337.createEd25519Transaction(shardID,txType,keypair.pub,keypair.prv,nonce,fee,payload);

console.log(tx);

web1337.sendTransaction(tx).then(value =>{

    console.log('Response from node => ',value)

    console.log(`TX ID is => `,web1337.blake3(tx.sig))

}).catch(err=>console.error('Error: ',err));
```

The structure of transaction that will be sent to node should be like this:

```code-runner-output
{
  v: 0,
  creator: '3JAeBnsMedzxjCMNWQYcAXtwGVE9A5DBQyXgWBujtL9R',
  type: 'WVM_CALL',
  nonce: 1,
  fee: '2000000000000000000',
  payload: {
    shard: 'shard_0',
    contractID: 'system/staking',
    method: 'stake',
    gasLimit: 0,
    params: {
      poolPubKey: '9GQ46rqY238rk2neSwgidap9ww5zbAN4dyqyC7j5ZnBK',
      amount: '100000000000000000000'
    },
    imports: []
  },
  sigType: 'D',
  sig: 'gNT1S5kN7rJtLBSCVclgp+kSN/aScQu65VVxPGXSji2KNLVOPAOp2ya/80eDjNBMUDMFXL4Q98UQzCjTBM8xBQ=='
}
```

And in console you should see something like this:

```code-runner-output
Sent =>  { status: 'Ok, tx redirected to current shard leader' }
TX ID is =>  685db080d685f73b79daa72676da2d6e8003e4eebc4d0e19410cb4e0f92a66c3
```

### Check the staking status

Once you have the transaction ID, go to the explorer and look at the transaction status:

<figure><img src="/files/cswzj61UNkTOaCIhk3qh" alt=""><figcaption></figcaption></figure>

### Wait untill the next epoches

Due to the network features (such as multi-level sharding, parallel virtual machines, etc.) - you need to wait some time until the rate comes into effect.

On the transaction status page, you will see a field that indicates which block the transaction was in.

<figure><img src="/files/EhhF3H8oyw2lBvYshbzP" alt=""><figcaption></figcaption></figure>

The first part of the identifier (44) indicates the epoch index when the block was created. This block was created in epoch 44.

{% hint style="info" %}
Well, that's it - only after 3 epoches your stake will come into effect. So, in this case, the stake will be activated on the epoch 47
{% endhint %}

### Make sure you're in a staking list

Now if you visit the validator page, you will see yourself in the list of stakers:

<figure><img src="/files/mACq7EW4rEGkOeAkVcD7" alt=""><figcaption></figcaption></figure>

<figure><img src="/files/UAFBE0A5qQ2b3dndutGG" alt=""><figcaption></figcaption></figure>

As you can see, the stake here is actually 100 coins.


# Unstaking

## Intro

When unstaking, you withdraw your coins from the staking balance of the validator you previously staked on.

## Method 1 - via user interface

Again, the easiest way to do this is through the interface on our website. As you remember:

1. We staked 27 coins
2. On the pool `6XvZpuCDjdvSuot3eLr24C1wqzcf2w4QqeDh9BnDKsNE`
3. From our account `0x9f8E68B1974069B854eE481deC0819697B901f1D`

<figure><img src="/files/OljzWGDbkP7ikAua8szS" alt=""><figcaption></figcaption></figure>

Our account is still on the list of stakers and receives rewards:

<figure><img src="/files/waWYu6TawhTmHduCgIUg" alt=""><figcaption></figcaption></figure>

On site - choose the mode **`Unstake`** . Input the amount and your pool

<figure><img src="/files/KLwC06uwNH6xD3rwgWe6" alt=""><figcaption></figcaption></figure>

Confirm the transaction

<figure><img src="/files/xa7P4yKwEh9u4MXPR8mS" alt=""><figcaption></figcaption></figure>

<figure><img src="/files/sfoMFK8AaNrkhiG6UiDX" alt=""><figcaption></figcaption></figure>

### Check the transaction status via explorer

<figure><img src="/files/CZlfjhl3pI52bUMFVH8h" alt=""><figcaption></figcaption></figure>

Unstaking also require some time. So, now we know that unstaking transaction was in block in epoch 12:

<figure><img src="/files/kAchu4zufDvbQJ7iAzMY" alt=""><figcaption></figcaption></figure>

{% hint style="info" %}
So, let's wait for epoch 12 + 3 = **15**
{% endhint %}

<figure><img src="/files/gXOz8VI96ZshNWqILoRc" alt=""><figcaption></figcaption></figure>

After this - you should receive your stake back

<figure><img src="/files/6AQ8JeERArQZ8jqAhbGt" alt=""><figcaption></figcaption></figure>

And if you visit the page of pool info:

<figure><img src="/files/5KpWOKOSzFNirIxvMwFS" alt=""><figcaption></figcaption></figure>

You will see that your account is not in the stakers list

<figure><img src="/files/xSOem8OCamg2WQ0FZfoc" alt=""><figcaption></figcaption></figure>

As you can see, your account has been removed from the list of stakers in this pool. From this moment on, you will no longer receive rewards.

## Method 2 - programmatic way using SDK

Let's assume that we have this:

1. Your address - `3JAeBnsMedzxjCMNWQYcAXtwGVE9A5DBQyXgWBujtL9R`
2. Pool you staked on - `9GQ46rqY238rk2neSwgidap9ww5zbAN4dyqyC7j5ZnBK`

Let's assume that we want to do the following:

1. Unstake 30 coins - this will return to our balance
2. 70 coins remain in the pool - you will continue to receive rewards from the validator

### 1. Call system smart contract to unstake

```javascript
import Web1337 from 'web1337';


let web1337 = new Web1337({

    chainID:'aaaaaaaaaaaaaaaaaaaaaaaaaaaaaaaaaaaaaaaaaaaaaaaaaaaaaaaaaaaaaaaa',
    workflowVersion:0,
    nodeURL: 'http://localhost:7332'

});


let keypair = {

    pub:"3JAeBnsMedzxjCMNWQYcAXtwGVE9A5DBQyXgWBujtL9R",

    prv:"MC4CAQAwBQYDK2VwBCIEIDteWfNev7NOlNmwP8Irwg5miWKoErYGV+UU5VrFgYev"

};

const shardID = "shard_0";


let payload = {

    shard: shardID,

    contractID:'system/staking',

    method:'unstake',

    gasLimit:0,

    params:{

        poolPubKey:'9GQ46rqY238rk2neSwgidap9ww5zbAN4dyqyC7j5ZnBK',
        amount: '30000000000000000000'

    },

    imports:[]

}


const fee = 2;

const nonce = await web1337.getAccount(shardID,keypair.pub).then(account=>account.nonce+1);

const txType = "WVM_CALL";

let tx = web1337.createEd25519Transaction(shardID,txType,keypair.pub,keypair.prv,nonce,fee,payload);

console.log(tx);

web1337.sendTransaction(tx).then(value =>{

    console.log('Sent => ',value)

    console.log(`TX ID is => `,web1337.blake3(tx.sig))

}).catch(err=>console.error('Error with unstaking: ',err));
```

Output:

```code-runner-output
{
  v: 0,
  creator: '3JAeBnsMedzxjCMNWQYcAXtwGVE9A5DBQyXgWBujtL9R',
  type: 'WVM_CALL',
  nonce: 2,
  fee: '2000000000000000000',
  payload: {
    shard: 'shard_0',
    contractID: 'system/staking',
    method: 'unstake',
    gasLimit: 0,
    params: {
      poolPubKey: '9GQ46rqY238rk2neSwgidap9ww5zbAN4dyqyC7j5ZnBK',
      amount: '30000000000000000000'
    },
    imports: []
  },
  sigType: 'D',
  sig: 'YkfiMMLFopmxwuf3pmuKgNrpcdOuhxg3D+szrMQyIwk6DcUCS0Tl4taNIbGX1nGsQRMXiuNpKASxqyUCJxZ0Cg=='
}
Sent =>  { status: 'OK' }
TX ID is =>  ee8053b379a44662252afcd42a316e152f47a45353f7accd294a9ee321a38aed
```

### 2. Check the unstaking tx status

Go to explorer and try to find your transaction

<figure><img src="/files/yyBaN6vCyk74NHzawwwz" alt=""><figcaption></figcaption></figure>

Transaction finished with `Success` :green\_circle: status

<figure><img src="/files/gpZESZIN2wU9vusGyoAi" alt=""><figcaption></figcaption></figure>

### 3. Wait untill the next epoches

There is also a delay for the unstaking procedure. Since the transaction was in epoch 61

<figure><img src="/files/0Mi8ci1sxuZoYpRMYuZm" alt=""><figcaption></figcaption></figure>

Then you will receive the coins in epoch **61+3=64**

### 4. Check that you have less coins in pool and receive your coins back

We waited for a while and now the epoch is **64.** Let's try to go to the pool page and see the list of stakers now:

<figure><img src="/files/4OrYxCaBS6FQDg9uWxzn" alt=""><figcaption></figcaption></figure>

Now in pool you have 70 coins instead of 100

<figure><img src="/files/I7aHqZNDdukGxYq85dBA" alt=""><figcaption></figcaption></figure>

And if you visit the page of your account you will see that 30 coins was sent to your address back

<figure><img src="/files/SA5BcW6Sq7HL6cD1q9Op" alt=""><figcaption></figcaption></figure>

Calculation:

```
Init balance: 20_000_000 (20 millions)

Balance after staking: 20_000_000 - 100(staking) - 2(fee) = 19_999_898

Balance after unstaking: 19_999_898 + 30(unstaking) - 2(fee) = 19_999_926
```

As you can see, everything is correct [✅](https://emojipedia.org/check-mark-button)


# Native liquid staking


# Multichain multiasset staking

## Intro

In an effort to increase decentralization rates and protect the network, as well as other chains in the ecosystem, we are introducing a new mechanism - now you can protect the network by delegating your coins, tokens from other projects. Also, you can use **social value points** - details will be later :wink:

This increases the number of potential validators in the Klyntar network, which makes the network stronger, more resilient and reliable!

### How it works ?

On the page with information about the validator, you will notice the **multistaking points** section. These points are credited to the validator when you stake coins/tokens on other blockchains in smart contracts or use your social value points to delegate to validator.

For this, validators will credit you with part of their rewards depending on the % that you staked.

<figure><img src="/files/YCBJKrjpMPfEbtyVK1sS" alt=""><figcaption></figcaption></figure>

<figure><img src="/files/FuQZzd0XeD8bGejf5gQP" alt=""><figcaption></figcaption></figure>

## Contracts source code

{% embed url="<https://github.com/KlyntarNetwork/MultistakingContracts>" %}


# Supported networks and tokens

## Initial support - EVM networks

The EVM chains have the highest liquidity and TVL - there are Ethereum, Binance Smart Chain, Avalanche, etc.

That is why we will launch the multistaking logic here as a starting point. This list will be updated over time, so stay tuned.

For such chains, we plan to implement multistaking for:

1. Native coins of the network (ETH, BSC, AVAX, etc.)
2. ERC-20 tokens (stablecoins, wrapped tokens, LPs, LRTs, LSTs, etc.)
3. ERC-721 tokens
4. etc.

So, to find the full list of supported assets - go to:

{% content-ref url="/pages/KJqJRU9Q5BzOLGZdfYDX" %}
[Full list of supported assets](/build-core-and-join-network/staking/multistaking/full-list-of-supported-assets)
{% endcontent-ref %}

## PoW based networks - Bitcoin, Litecoin, Doge, Kaspa, etc.

There are also chains that do not have smart contracts, which complicates our multi-staking logic.

That is why at the initial stages we plan to use their wrapped versions in different chains. For example:

1. WBTC - wrapped BTC
2. LTC (BEP-20)
3. DOGE (BEP-20)
4. XRP (BEP-20)
5. etc.

## Move based chains - Aptos, SUI, etc.

Such chains indeed have smart contracts, but the Move language is new, which means that the practices for multistaking logic will be different from smart contracts on Solidity.

<mark style="color:red;">**So, to avoid mistakes and not take risks, we focus on smart contracts in EVM chains.**</mark>

That is why if you have assets in these chains, use bridges to receive tokens in any EVM-compatible chain that we support

## Cosmos based chains

The Cosmos ecosystem also has a large number of chains and interesting tokens that can be used for multi-staking. Therefore, use bridges to transfer your tokens to EVM chains

## Other chains - Solana, Near, Tron, TON, Cardano, etc.

We also want to bring multistaking to chains that also have a lot of weight in the crypto industry, have a large community, many interesting projects in ecosystems and much more.

Such chains include both the most popular market tops - for example, Solana, Cardano, Tron, Ton, Near, and less popular projects.

At the initial stage, we also recommend transferring assets from these chains to the EVM environment. However, in the future we may directly support these chains.

## Restaking/Liquid Restaking protocols - EigenLayer, Karak, Babylon, Allstake, etc.


# Full list of supported assets

## Native coins

| Asset name | Chain     | Multistaking address |
| ---------- | --------- | -------------------- |
| Ethereum   | Ethereum  |                      |
| BSC        | BSC       |                      |
| AVAX       | Avalanche |                      |
| TRON       | TRON      |                      |

## ERC-20 tokens

| Asset name | Chain     | Multistaking address |
| ---------- | --------- | -------------------- |
| USDT       | Ethereum  |                      |
| USDT       | BSC       |                      |
| USDT       | Avalanche |                      |
| USDT       | TRON      |                      |
|            |           |                      |
| WBTC       | Ethereum  |                      |
|            |           |                      |

## ERC-721 tokens

| Collection | Chain     | Multistaking address |
| ---------- | --------- | -------------------- |
|            | Ethereum  |                      |
|            | BSC       |                      |
|            | Avalanche |                      |
|            | TRON      |                      |


# Work with native coins

## Intro

By placing your native network coins on a multistaking contract, you receive similar liquidity tokens in a 1:1 ratio.

This way, you can earn rewards on Klyntar (helping to decentralize the network) and at the same time continue to use the tokens in DeFi applications, lending protocols, etc.

In this tutorial we will show how to multistake the native coins on EVM chains - ETH, AVAX, BNB, TRON etc.

You can repeat the multistaking process through the interface on our website:

{% embed url="<https://klyntar.org/multistaking>" %}

## 1. Stake native chain coins to get liquidity tokens back and earn staking points

Visit the page

<figure><img src="/files/LMU517GwSbPGza8Pv2JD" alt=""><figcaption></figcaption></figure>

You will see the following interface

<figure><img src="/files/V4PnIhpTUGVDgmn2kWPI" alt=""><figcaption></figcaption></figure>

Now select the chain and wallet to connect

{% hint style="info" %}
In this tutorial we'll work with Sepolia network (Ethereum testnet)
{% endhint %}

<figure><img src="/files/8DWobnoiuCEYe0hSzSfA" alt=""><figcaption></figcaption></figure>

Right after connection you will see how much you already multistaked on appropriate contract in dollar equivalent

<figure><img src="/files/T0HfbrEaTyoyHwAMzIi2" alt=""><figcaption></figcaption></figure>

Choose the appropraite operation **Deposit** and token to stake - in this case native coin of network

<figure><img src="/files/t1honbHVutrnMaJTCtIQ" alt=""><figcaption></figcaption></figure>

The next steps:

1. Input amount - let's say you want to stake 0.01 Sepolia ETH
2. Choose the pool from list

<figure><img src="/files/48mkczVH0pKafDyKhPB8" alt=""><figcaption></figcaption></figure>

Finally - just press **Deposit** and confirm the transaction from your wallet extension

### What is under the hood :thinking:

Let's check the explorer to see what transactions are actually called and what happens in detail. As you can see, we transferred 0.01 SepoliaETH and received 0.01 KETH(KlyntarETH) back.

<figure><img src="/files/0qct0El8DgDgcvh4sMt9" alt=""><figcaption></figcaption></figure>

### So, what you have

At this stage you have:

1. 0.01 KETH already on your balance - it's ERC-20 token which is 1:1 to native network coin. This avoids freezing liquidity. You can continue to use your KETH in DeFi applications or simply continue to HODL
2. At the same time, the pool you staked on will share some of its rewards with you. With your staking points, you increase the pool's chance of being elected to a quorum and/or generating blocks.

### Wait 3 epoches to make your stake active

Your stake will not become active immediately - the activation time currently takes 3 epochs - which is equivalent to 3 days.

### Check the stakers list

After a while, you can go to the page of the pool you staked on and find yourself in the list of stakers

<figure><img src="/files/qFMPHJEfcXu1NqwG69jw" alt=""><figcaption></figcaption></figure>

<figure><img src="/files/ikqFDgmrODORjD9T03bM" alt=""><figcaption></figcaption></figure>

## 2. Unstaking these liquidity tokens to get back your real ETHes, BSCs, AVAXes, etc.

So you have 0.01 KETH and you want to get your original SepoliaETH back.

Choose **Unstake** and input all the required data

<figure><img src="/files/zsPFAVHU1kWGtiMH4mm2" alt=""><figcaption></figcaption></figure>

{% hint style="info" %}
The field with amount will show you have much you can unstake
{% endhint %}

### Unstaking details

During the unstaking process, you burn the wrapped KETH token and release your real SepoliaETH tokens

<figure><img src="/files/3gdiv8G1X4tT3zCSDfn6" alt=""><figcaption></figcaption></figure>

### Wait for a while to release your stake

The unstaking time also takes **3 epochs**, so initially your stake gets into **withdrawal requests**

<figure><img src="/files/kJkW4Q8FSVLD50qJWzlM" alt=""><figcaption></figcaption></figure>

## 3. The last step - withdraw your stake

Choose **Withdraw** section and press a button to initiate a transaction

<figure><img src="/files/RMwYsXMZYWqjaxHsxahE" alt=""><figcaption></figcaption></figure>

{% hint style="success" %}
After that you will finally get your original coins back
{% endhint %}

## FAQ

<details>

<summary>How to unstake from multiple pools immediately</summary>

TODO

</details>


# Work with ERC-20 tokens

## Intro

By placing your ERC-20 tokens on a multistaking contract, you receive similar liquidity tokens in a 1:1 ratio.

This way, you can earn rewards on Klyntar (helping to decentralize the network) and at the same time continue to use the tokens in DeFi applications, lending protocols, etc.

In this tutorial we will show how to multistake the Chainlink ERC-20 token in Sepolia testnet, but the same way it works for any other ERC-20 tokens that will be supported by our network.

To get the list of supported ERC-20 tokens - check the docs:

{% content-ref url="/pages/KJqJRU9Q5BzOLGZdfYDX" %}
[Full list of supported assets](/build-core-and-join-network/staking/multistaking/full-list-of-supported-assets)
{% endcontent-ref %}

Or via the form on our site:

{% embed url="<https://klyntar.org/multistaking>" %}

## 1. Stake ERC-20 token to get liquidity tokens back and earn staking points

Visit the page

<figure><img src="/files/z5YfpWjP6dt9j3lmZXuJ" alt=""><figcaption></figcaption></figure>

You will see the following interface

<figure><img src="/files/JhQlzncLX7fTX7pi2Gsr" alt=""><figcaption></figcaption></figure>

Now select the chain and press **Select wallet**

{% hint style="info" %}
In this tutorial we'll work with Sepolia network (Ethereum testnet)
{% endhint %}

<figure><img src="/files/xu4S4bRUgjwMcbpcMqvh" alt=""><figcaption></figcaption></figure>

Right after connection you will see how much you already multistaked on appropriate contract in dollar equivalent

<figure><img src="/files/rDGpkaxYeXGluHXLxwdt" alt=""><figcaption></figcaption></figure>

Choose the appropraite operation **Deposit** and token to stake - in this case ERC-20 token of Chainlink project:

{% embed url="<https://sepolia.etherscan.io/token/0x779877a7b0d9e8603169ddbd7836e478b4624789>" %}

Input amount of tokens and choose the pool to stake on

<figure><img src="/files/zNBG6jRUyYNmV5zmBqwc" alt=""><figcaption></figcaption></figure>

### Transaction details

Two subactions occured during transaction:

1. You transfer 10 LINK tokens to multistaking contract
2. You receive 10 KLINK (Klyntar LINK) tokens back to avoid liquidity freeze

<figure><img src="/files/KAkJv3EjKv0WMBN5uuSa" alt=""><figcaption></figcaption></figure>

After 3 epochs your address will appear in the list of stakers for the selected pool

<figure><img src="/files/IQwvMTyRYuIsPLLatQ2r" alt=""><figcaption></figcaption></figure>

{% hint style="success" %}
From now you have successfully finish the staking process. You will now receive rewards from the pool you staked on.
{% endhint %}

## 2. Unstaking ERC-20 to burn our liquidity token and get back you original tokens

To unstake - press **Unstake**, choose the token, input amount and finally the pool

<figure><img src="/files/7qNd06IxqqWshHLvKzlu" alt=""><figcaption></figcaption></figure>

{% hint style="info" %}
As before - the unstaking process takes 3 epochs and initially the stake will be placed in the withdrawal requests
{% endhint %}

## 3. Final step - withdrawal

It's time to get your original tokens back. Select **Withdraw** and press a button to initiate the transaction

<figure><img src="/files/k4VYWQyM5yLsxCIwCAo9" alt=""><figcaption></figcaption></figure>

If you check via explorer, you will notice that within this transaction, the multistaking contract returned 10 original Chainlink tokens back to your address.

<figure><img src="/files/DHGsxC3tE8YVaZhWyomI" alt=""><figcaption></figcaption></figure>

## FAQ

<details>

<summary>How to unstake from multiple pools</summary>

TODO

</details>


# Work with ERC-721 tokens

## NFT multistaking

Coming soon !


# Other


# Work with Bitcoin, Litecoin and Doge

## Liquid way - ERC-20 tokens in EVM compatible networks

## Non-liquid and non-custodial way - P2SH coins freeze directly in network


# Work with XRP network

## Liquid way - ERC-20 tokens in EVM compatible networks

## Non-liquid and non-custodial way - escrow transactions directly in XRP network


# Work with TRON network


# Work with Solana


# Social value points


# Telegram


# Github


# Instagram


# Facebook (Meta)


# YouTube


# LinkedIn


# Twitter


# Discord


# TikTok


# Spotify


# Hirsch index


# Business value


# Add your own asset


# Connect your stakes from EigenLayer, Karak, Babylon, Solayer, etc.


# Claiming rewards

## Intro

When you stake your coins on a validator, you help it to be eligible to participate in consensus process. In return, the validator will share part of its profits with you.

## Automatic reward accrual

On Klyntar, rewards are credited automatically <mark style="color:green;">**immediately**</mark> directly to your account. So you don't have to do anything :relaxed: - you will get rewards without any conditions or extra claiming transactions.


# Become a validator

## Intro

Creating a new validator helps the network to be more decentralized and resilient. On this page we will show you how to create a validator to prepare it for the staking process.

## 1. Prepare your keypair

Let's imagine that you have a pair of ed25519 keys that you will use to control your validator. To generate such a pair - use the tutorial here:

{% embed url="<https://docs.klyntar.org/web1337/transactions-and-smart-contracts/default-ed25519-transactions#keypair-creation-process>" %}

Let's say a key pair looks like this:

```javascript
const keypair = {

    pub:"3JAeBnsMedzxjCMNWQYcAXtwGVE9A5DBQyXgWBujtL9R",

    prv:"MC4CAQAwBQYDK2VwBCIEIDteWfNev7NOlNmwP8Irwg5miWKoErYGV+UU5VrFgYev"

}
```

## 2. Create the transaction to call staking system smart contract

Use the Web1337 SDK to create a call to system smart contract

```javascript
import Web1337 from 'web1337';


const web1337 = new Web1337({

    chainID:'aaaaaaaaaaaaaaaaaaaaaaaaaaaaaaaaaaaaaaaaaaaaaaaaaaaaaaaaaaaaaaaa',
    workflowVersion:0,
    nodeURL: 'http://localhost:7332' // set the URL to your own node

});


const keypair = {

    pub:"3JAeBnsMedzxjCMNWQYcAXtwGVE9A5DBQyXgWBujtL9R",

    prv:"MC4CAQAwBQYDK2VwBCIEIDteWfNev7NOlNmwP8Irwg5miWKoErYGV+UU5VrFgYev"

};

const shardID = "shard_0";

const fee = 2;


let payload = {

    contractID:'system/staking',

    method:'createStakingPool',

    gasLimit:0,

    params:{
        
        percentage:30,
        
        poolURL:'http://localhost:7335', // set your own domain/ip
        
        wssPoolURL:'ws://localhost:9335' // set your own domain/ip

    },

    imports:[]

};

const nonce = await web1337.getAccount(shardID,keypair.pub).then(account=>account.nonce+1);

const txType = "WVM_CALL";

let tx = web1337.createEd25519Transaction(shardID,txType,keypair.pub,keypair.prv,nonce,fee,payload);

console.log(tx);

web1337.sendTransaction(tx).then(()=>{

     console.log('Sent status => ok')
     console.log(`TX ID is => `,web1337.blake3(tx.sig))

}).catch(err=>console.error('Error during pool creation: ',err))
```

#### Output example:

```code-runner-output
{
  v: 0,
  creator: '3JAeBnsMedzxjCMNWQYcAXtwGVE9A5DBQyXgWBujtL9R',
  type: 'WVM_CALL',
  nonce: 1,
  fee: '2000000000000000000',
  payload: {
    contractID: 'system/staking',
    method: 'createStakingPool',
    gasLimit: 0,
    params: {
      percentage: 30,
      poolURL: 'http://localhost:7335',
      wssPoolURL: 'ws://localhost:9335'
    },
    imports: []
  },
  sigType: 'D',
  sig: 'T9uU7l58HEPgzcQMUObvZYxLKb28WRN2F21ec5Bt++wAJTZynUh1ofI0Pi98SMjLxOqQqmyLuFimJNaV7zCNDg=='
}


Sent status => ok
TX ID is =>  731c5f2ca6e1690b447da956c1a306692232e2101e8f89e8813be5bee3c5c37e
```

### Check the transaction status

Go to explorer, choose the filter and paste the transaction ID to searchbar

<figure><img src="/files/CO7bLSeXzrjz3xm6rjqe" alt=""><figcaption></figcaption></figure>

Yes, as expected the pool creation process was successful

<figure><img src="/files/51RGZqUxafKBg65rQtEA" alt=""><figcaption></figcaption></figure>

Please note that this transaction was in a block that was in epoch **89** (see the first part of the block identifier before the colon sign)

<figure><img src="/files/kuViLH2riWzntTXibA0N" alt=""><figcaption></figcaption></figure>

## 3. Wait untill the next epoches

So as soon as 3 epochs have passed, you can go and check whether your pool has appeared in the state

<figure><img src="/files/8cwFpt5qb7bcjX6yOFfi" alt=""><figcaption></figcaption></figure>

Great, as you can see the pool was indeed added to the state

<figure><img src="/files/yqgKFqvxbYf7G5mmklcy" alt=""><figcaption></figcaption></figure>

At the moment this pool is empty - it has:

1. No staked native coins(so see [Default staking](/build-core-and-join-network/staking/default-staking))
2. Staking points called UNO(unobtanium)(so see [Multichain multiasset staking](/build-core-and-join-network/staking/multistaking))

<figure><img src="/files/05QPXzmG0XN4dedTXap1" alt=""><figcaption></figcaption></figure>

Also, when creating a pool, the address of the pool owner is automatically added to the list of stakers, although the initial stake values ​​are zero

<figure><img src="/files/D9ukF9Vlv1JiITgRwu7a" alt=""><figcaption></figcaption></figure>

{% hint style="success" %}
Now everything is ready to move on to the most interesting part - staking
{% endhint %}

## 4. How much do you need to launch a validator

Just visit the main page of explorer and check the section **Network Parameters > Validator Stake Size**

<figure><img src="/files/JbsOG64Br3l9ebmYXYnk" alt=""><figcaption></figcaption></figure>

{% hint style="info" %}
This amount of coins is required to make your validator eligible to be elected to a quorum and/or to generate blocks
{% endhint %}

Also, on the validator page you can see how many coins are already staked on it

<figure><img src="/files/iDXPSOXiQWvr8IsP2A14" alt=""><figcaption></figcaption></figure>

As you can see here validator has 55 000 staked coins while required minimum is 50 000. So this validator is eligible to generate blocks and take part in approvement.

## 5. Start staking

Go to the next sections to learn more about staking and multistaking. How to do it via user interface or via SDK - details are in the next sections :relaxed:

{% content-ref url="/pages/Ce9jAOoetrCVCgeIrmFO" %}
[Default staking](/build-core-and-join-network/staking/default-staking)
{% endcontent-ref %}

{% content-ref url="/pages/Ttelg9GSaE1IK0j2YcoQ" %}
[Multichain multiasset staking](/build-core-and-join-network/staking/multistaking)
{% endcontent-ref %}

## Short FAQ

<details>

<summary>Does <mark style="color:blue;">pool</mark> and <mark style="color:red;">validator</mark> are the same ?</summary>

Yes [✅](https://emojipedia.org/check-mark-button)

</details>

<details>

<summary>What is the minimum / maximum stake ?</summary>

There is no maximum stake, but there's a minumum. You can see this value on the main page of explorer in **Network Parameters** section

![](/files/wGvb6J6MZBV5FoQOcKqR)

</details>

<details>

<summary>Is it possible to reduce the await time for creating a validator ?</summary>

Because of network architecture - <mark style="color:red;">**no**</mark>

</details>


# Mobile & low power devices validators

## Android

## IOS


# Customizations


# Create own mutation


# Create own plugin


# Run your node over TOR


# Plugins usage


# Explorers and how to use them


# Public Explorer

UX guide to use klyntarscan.org

<figure><img src="/files/noBvaKQy80EcikZpYmLr" alt=""><figcaption></figcaption></figure>


# Your own custom explorer

## Intro

During development, it is often useful to visualize changes in the chain.

For example, when launching a private testnet, it would be interesting to know the details of the network operation - created blocks, transaction statuses, validators, shards, and so on.

That is why we decided to make our explorer open source. But in general, there are two reasons:

1. The ability to make changes to the common repository by different developers
2. The ability to simplify the process of development and interaction with the Klyntar network

Therefore, below you will see the process of launching a local explorer and a short guide on using it

<figure><img src="/files/9bcXvadSCiz2ANfBqkoF" alt=""><figcaption></figcaption></figure>

## Installation process

Install **Node.js** first

Then, clone repository

```bash
git clone https://github.com/KlyntarNetwork/Explorer.git
```

Then, go to repository and install dependencies

```bash
cd Explorer && npm install
```

## Options

Now, if you need just explorer to view network - build it and run

```bash
npm run build

npm start
```

In case you want to make changes to explorer and track changes - run it in development mode

```bash
npm run dev
```

## Environmental variables

By default, explorer expects a URL for node RPC. This is how it looks like in code&#x20;

```typescript
const baseUrl = process.env.KLYNTAR_NODE_URL || 'http://localhost:7332';
```

So, set `KLYNTAR_NODE_URL` manually in Linux/Windows/Mac or just run your node on port 7332

## Usage

Go to <http://localhost:3000> and check the main page of explorer

<figure><img src="/files/nBvF75qsNv4zoK0yfa0N" alt=""><figcaption></figcaption></figure>

There are 3 main areas you should pay attention to here:

1. **Searchbar**
2. **Network Parameters** section
3. **Network Info** - section with starting points to other pages that detail the explorer

Find out more about how to use them in the **Usage guide** section

{% content-ref url="/pages/RDfQnlKGfh6VUBH0N4yd" %}
[Usage guide](/build-core-and-join-network/explorers-and-how-to-use-them/usage-guide)
{% endcontent-ref %}


# Usage guide


# Network Parameters

This is the simplest section that will tell you about the current network parameters

<figure><img src="/files/Qb7oH31mJhDAXGcIYghE" alt=""><figcaption></figcaption></figure>

These parameters are specified in the genesis and they regulate the operation of the network. Here you will find information about the network ID, the bet size for the validator, the duration of the epoch, and so on.

So, for example, if you look at genesis, you will see similar indicators - they will be displayed in the interface.

```json
"NETWORK_PARAMETERS":{

        "VALIDATOR_STAKE":50000,
        "MINIMAL_STAKE_PER_ENTITY":20,
        "QUORUM_SIZE":127,
        "EPOCH_TIME":90000,
        "LEADERSHIP_TIMEFRAME":60000,
        "BLOCK_TIME":1000,
        "MAX_BLOCK_SIZE_IN_BYTES":12288000,
        "TXS_LIMIT_PER_BLOCK":30000
    
}
```


# Searchbar

In searchbar you can find everything you need by applying a special filter. Please, click the button to expand the full list of available filters

<figure><img src="/files/o8FD1Hrq9YsPwwBEiYNv" alt=""><figcaption><p>Full list of filters</p></figcaption></figure>

Follow the prompts in the input field to find what you need :relaxed:&#x20;

## Find your transaction by tx ID

Choose appropriate filter and paste TxID. Please note that:

1. KLY native tx id is 256-bit BLAKE3 hash
2. KLY-EVM tx id is 256-bit 0x-prefixed SHA3 hash

For example:

<figure><img src="/files/8610WBjrkovXiyopN0Lr" alt=""><figcaption></figcaption></figure>

<figure><img src="/files/oeFCgglbIyZzJUaIpWsr" alt=""><figcaption></figcaption></figure>

The same works for EVM transactions. Get the txid from your wallet or web3 SDK and paste to explorer

<figure><img src="/files/UAqIFHFnPO3Ql4mZvZV2" alt=""><figcaption></figcaption></figure>

<figure><img src="/files/3GLzVvAbnYexjpm1kbGo" alt=""><figcaption></figcaption></figure>

{% hint style="success" %}
Note that there are 2 types of transactions shown here - the transaction is running in parallel mode and not in parallel. **Klyntar has full parallel support - parallel WASM VM, parallel EVM, etc.**
{% endhint %}

## Find block by shard index&#x20;

Each shard works as independent linear blockchain. So, to find the first block on shard or, saying 1337th block on shard choose filter and paste required input

Find the first block on shard 0 (indexation starts from 0)

<figure><img src="/files/7NOtNY1NNzhmJ9ObRktB" alt=""><figcaption></figcaption></figure>

Result

<figure><img src="/files/WdQEmaa8T37SxQzLhWQS" alt=""><figcaption></figcaption></figure>

Find the block 1337th on shard 0

<figure><img src="/files/P9mFtPZ8xD9iGCFNBEKE" alt=""><figcaption></figcaption></figure>

<figure><img src="/files/HkygfdoX31qyi7yVkMHd" alt=""><figcaption></figcaption></figure>

## Find block by ID

Also, each block has own ID. This ID consists of 3 parts:

1. Epoch Index
2. Creator-pool pubkey (currently Ed25519), Base58 encoded
3. Block index in own sequence

In each epoch on each shard there is a timeframe for each validator to generate blocks. Each validator starts own sequence of indexation.

For example, if:

1. Epoch index = 455
2. Set of validators for shard X - V0, V1, V2

The IDs of blocks will be:

1. 455:V0:107 - 107th block by pool V0 on epoch 455
2. 455:V1:37 - 37th block by pool V1 on epoch 455
3. 455:V2:10 - 10th block by pool V2 on epoch 455

So, choose filter, paste ID and search

<figure><img src="/files/ZValPcKK7ydDwzKeMHAm" alt=""><figcaption></figcaption></figure>

<figure><img src="/files/5oiIDKdVx2COBFEl7XMA" alt=""><figcaption></figcaption></figure>

If you click \`Check AFP\` you will be able to see the AFP - aggregated finalization proof created by quorum majority. If block has this proof - it's a signal that it was approved and included to blockchain

<figure><img src="/files/zg0BZObwZQFcXPUuXGNX" alt=""><figcaption></figcaption></figure>

AFP presented in a raw form but your node and developers will know what to do with it

<figure><img src="/files/x2tQCDod0fNIlgbsZzuz" alt=""><figcaption></figcaption></figure>

## Find staking pool(validator) by ID

Pool has appropriate pubkey and the full ID of pool will be pubkey + `(POOL)` postfix

For example, go to searchbar and try to find:

<figure><img src="/files/IwHcQO2Pea53NiF1Vd48" alt=""><figcaption></figcaption></figure>

You will be redirected here

<figure><img src="/files/QS9N4aQZpN1jTagZLmTg" alt=""><figcaption></figcaption></figure>

## Find epoch data by ID

The easiest - just pase index of epoch and find required data

<figure><img src="/files/L3isjiGmaqGw51yQzCJg" alt=""><figcaption></figcaption></figure>

<figure><img src="/files/dJ4rKSllFkhyc1ykRzj7" alt=""><figcaption></figcaption></figure>

## Find account info by ID

There are 2 types of accounts in KLY network - **user**(EOA - externally owned account) and **contract.**

Due to the sharded nature of our network, when searching for an account (user or contract) you should specify a prefix with the shard ID.

For example:

1. User account vlad on shard\_0 has ID - **shard\_0:vlad**
2. Contract **blablabla** on shard\_5 has ID - **shard\_5:blablabla**

Examples

## Find user account by ID

<figure><img src="/files/DzKTe7yyde6XN6nWIquK" alt=""><figcaption></figcaption></figure>

<figure><img src="/files/Lr9nxKGqvXiLcU3xNEaV" alt=""><figcaption></figcaption></figure>

<figure><img src="/files/9U16VhHUirvNskuLrc4P" alt=""><figcaption></figcaption></figure>

<figure><img src="/files/qxM0C43nquRY4QlPHgVv" alt=""><figcaption></figcaption></figure>

### Find EVM user account

<figure><img src="/files/rmPlHVIanyexbFFJ7dFp" alt=""><figcaption></figcaption></figure>

<figure><img src="/files/SEWN002uoimmvm8xAFah" alt=""><figcaption></figcaption></figure>

## Find KLY-WVM contract account

<figure><img src="/files/uQE34GEsjLLi74K440To" alt=""><figcaption></figcaption></figure>

<figure><img src="/files/6BzoIXpSEt1oFBfSP0ux" alt=""><figcaption></figcaption></figure>

### Find KLY-EVM contract account

<figure><img src="/files/gOh2MTScye3UhkV4lGED" alt=""><figcaption></figcaption></figure>

<figure><img src="/files/oWPNxrmZcCAnJhN0IAVQ" alt=""><figcaption></figcaption></figure>


# Network Info

In order to provide maximum detail, we decided to create separate pages for different data. Available sections are highlighted, and those that will be available soon are blocked for now

<figure><img src="/files/iRkgaiaVC1YhaY0zDdVY" alt=""><figcaption></figcaption></figure>


# Epoches data

Go to page `Epoches data` page

<figure><img src="/files/t1Pl52c0dLJlZwgbGdH1" alt=""><figcaption></figcaption></figure>

Here you can get more details about current epoch. Using arrow buttons it's possible to track the history of epoches.

Below you can also check the list of validators and selector of shards. By changing the shard it will be possible to check assigned block creators to shards

<figure><img src="/files/DOlFK8YiuvAACzcwKPBJ" alt=""><figcaption></figcaption></figure>

## Get more info about validator(a.k.a staking pool)

By clicking on validator above - you will be redirected to page about this pool

<figure><img src="/files/e1AEKLlX4PzwClcVgClR" alt=""><figcaption></figcaption></figure>

Get the list of stakers and explore their accounts

<figure><img src="/files/ygoGGnIzgb4bQz4vFP2S" alt=""><figcaption></figcaption></figure>


# Hostchain checkpoints

**Hostchains** are independent L0-L1 blockchains that rely on their own security, fault tolerance and decentralization.

> ### We use their <mark style="color:red;">TOTAL POWER</mark> as the maximum source of liquidity and decentralization

## <mark style="color:red;">Problem</mark>

### PoS/BFT blockchains are vulnerable to so-called <mark style="color:red;">long-range attack</mark>

Its essence is that when you start synchronizing your node with the current state of the blockchain, you have to start checking blocks 0,1,2,... and so on. At the same time, you need to take these blocks from somewhere and here is the problem - **how to make sure which block is valid?**

If, say, block 1337th was generated and confirmed by the network more than 3 years ago, then with a high degree of probability those old validators are no longer active and may have even removed their shares from staking. A problem arises - you cannot clearly determine which block with index 1337 was correct - anyone can offer you any valid fork.

## Solution

{% hint style="info" %}
In order for you to be able to check the relevance of your copy of the blockchain, the current quorum (current validators who have frozen their stake and who can be trusted because they have something to risk) makes "checkpoints" to other blockchains once per epoch (or with other frequency)
{% endhint %}

A checkpoint is a fact that looks like this, for example:

```json
{ 
    epoch: 167,
    lastLeaderIndex: 27,
    lastBlockIndexByShardLeader: 56,
    lastBlockHashByShardLeader: 'aaaa...'
}
```

If such a message is saved on many blockchains, then even after many years it can be trusted, because in order to potentially change it, attackers would need to compromise most of the blockchains.

{% hint style="success" %} <mark style="color:red;">**TLDR**</mark> - having found such a message in 2/3 of the blockchains that we will use to maintain checkpoints, you can be confident about the validity of your own copy of the state and blockchain.
{% endhint %}

So, on this page you will find this

<figure><img src="/files/Qo7tI5AyYksMYA2dBusr" alt=""><figcaption></figcaption></figure>

Here for each epoch, a list of checkpoints and links to the corresponding transactions in other blockchains is available.

Here **Bitcoin**, **Ethereum** and **Solana** are used as examples

In many cases, it is recommended to trust the validity of the epoch data where 2/3N checkpoints are available. This is a guarantee that the checkpoint is made forever

Long story short you can trust this

<figure><img src="/files/ySzY4bMQjTXsMUax5Le8" alt=""><figcaption></figcaption></figure>

And this

<figure><img src="/files/SojmeCenpdMCgz9UEVMI" alt=""><figcaption></figcaption></figure>

But doubt this:

<figure><img src="/files/VQbJWdWNgNWyeMb7DA79" alt=""><figcaption></figcaption></figure>


# Web1337 intro

## What is Web1337?

Web2, Web3, Web5...OMG what next? To stop and/or ridicule the manifesto of insanity, we have decided to create a new term, Web1337. If every day every new project invents its own new **Web**<mark style="color:red;">**\<set number here>**</mark> we thought - why are we worse?

In general, Web1337 is a library for interacting with the KLY ecosystem, ranging from typical APIs to various features such as interacting with smart contracts, various services in the KLY network.

In addition, KLY offers various interesting features such as RWX codeless smart contracts, post-quantum cryptography, creation of custom blockchains, instant implementation of improvement proposals, etc. All of this can be interacted and created using Web1337.

In conclusion, we can add that Web1337 is Web3++, since KLY offers more features than typical blockchain projects. You will learn more about this later.<br>

<figure><img src="/files/tLsK43Xe1xemFPTC7tKX" alt=""><figcaption></figcaption></figure>

{% embed url="<https://github.com/KlyntarNetwork/Web1337>" %}

## Support

Web1337 is now available for JavaScript environments, but we will be adding Web1337 for Python, Rust, Golang and other languages soon. Stay tuned!

## Difficulty levels

The Web1337 user guide has been divided into several levels depending on the complexity:

* :green\_circle: - easy. Simple one-line API call for basic interaction with KLY
* :orange\_circle: - medium. More advanced usage. Transactions, contract deployments, etc.
* :red\_circle: - advanced. Instructions of how to use advanced cryptography in EVM / WASM smart-contracts, instructions for DApps 2.0, mutations and other interesting stuff.


# Simple API requests

Simple, one-line APIs. No rocket science

## Postman

All APIs that the KLY core contains are well documented and available in our Postman organization

<figure><img src="/files/jDpbKwguM0JTBJsm8uUH" alt=""><figcaption></figcaption></figure>

{% embed url="<https://documenter.getpostman.com/view/25402389/2s93Y2S2FJ#097a6b76-d477-48c0-90b2-edb5743ebbf7>" %}

Please, follow the link to test it on your own and check the useful example for each request :relaxed:

## Multilanguage support

Web1337 SDK has implementations for various languages ​​such as JS(Node.js), Golang, Python and others!

In the initial stages, this documentation will provide an example of an API call for the JS SDK, but in other languages ​​the methods and their names have a similar meaning.

Also, don't forget to use the Postman documentation where you can learn about queries and data formats.

## Create the Web1337 instance

Here you just need to import the library to your project workspace and create the instance using this snippet:

```javascript
import Web1337 from 'web1337';


let web1337 = new Web1337({

    chainID:'aaaaaaaaaaaaaaaaaaaaaaaaaaaaaaaaaaaaaaaaaaaaaaaaaaaaaaaaaaaaaaaa',
    workflowVersion:0,
    nodeURL:'http://localhost:7332'
    // proxyURL:'http://localhost:8888' // optional - for example 'http(s)://login:password@127.0.0.1:8080' or 'socks5h://Vlad:Cher@127.0.0.1:9150'
});
```

* **chainID** - 256-bit identifier of appropriate symbiote(something like chain id in EVM). On a technical level, this is the BLAKE3 manifest hash of the chain file which includes the genesis hash, the repository version hash and so on. For maximum security, it is recommended to include the manifest in several blockchains (hostchains) at once
* **workflowVersion** - major version number of workflow of your symbiote to make sure you know the further logic in this version
* **nodeURL** - the endpoint of node to interact with network. It might be your own node, Node-as-a-Service provider, etc.
* **proxyURL&#x20;**<mark style="color:red;">**(optional)**</mark> - the URL of proxy that will be used to interact with node. It might be HTTP(s) or SOCKS proxy(to allow connections over TOR/I2P or other SOCKS)

{% hint style="info" %}
Only three first components are required for proper work
{% endhint %}

## Call methods

Once you create web1337 instance you have ability to call methods without manual request construction.

For example, to get block by ID, call:

```javascript
// Block id format is <epochIndex>:<pubkeyOfCreator>:<blockIndexInEpoch>
let blockID = "1:9GQ46rqY238rk2neSwgidap9ww5zbAN4dyqyC7j5ZnBK:15";

await web1337.getBlockByBlockID(blockID);
```

For example, to get information about pool call

```javascript
let poolID = "6XvZpuCDjdvSuot3eLr24C1wqzcf2w4QqeDh9BnDKsNE(POOL)";

await web1337.getPoolStats(poolID);
```

Or, to check the synchronization status of your node, call

```javascript
await web1337.getSynchronizationStatus()
```

## Try yourself :nerd:

Try playing and studying the methods available in the SDK. If necessary, as mentioned earlier, check Postman.


# Block API

## Get block by ID

Block ID consists of 3 parts:

1. Epoch index when block was created
2. Pubkey of pool who created this block
3. Index of block in own sequence. It's individual for each new creator

For example, to get the block 15th by pool `9GQ46rqY238rk2neSwgidap9ww5zbAN4dyqyC7j5ZnBK` created in epoch 1 you need to call

```javascript
let blockID = "1:9GQ46rqY238rk2neSwgidap9ww5zbAN4dyqyC7j5ZnBK:15"

await web1337.getBlockByBlockID(blockID)
```

## Get block by SID

SID stands for **shard index**. Each shard in Klyntar exists as a separate chain so it has linear sequence of blocks.

Just like in non-sharded blockchains like Bitcoin, Ethereum, Solana etc. you just need to find for wished height

For example, to get the most first block on just find:

```javascript
let absoluteHeight = 0;

await web1337.getBlockBySID(absoluteHeight);
```

## Get sequence of N blocks on shard

The same as previous API, but returns the multiple N blocks started from some index.

For example, to get the list of 20 blocks from block 34 to block 34-20=**14 ,** just try:

```javascript
let startIndex = 34;

let limit = 20;

await web1337.getLatestNBlocks(shard,startIndex,limit);
```

{% hint style="info" %}
This route is useful for explorer pages, pagination, etc.
{% endhint %}

## Get total number of blocks, transactions and successful transactions

This API returns general stats - from genesis to the current time. Number of blocks and transactions during the whole time - on each shard

```javascript
await web1337.getTotalBlocksAndTxsStats()
```


# Epoch API

An epoch is a certain period of time in which the network operates.

Each epoch, the network assigns a new quorum, new sequences of shard leaders, and so on.

Use this list of APIs to get information about epoch data.&#x20;

## Get current epoch on threads

In our system, the threads of block confirmation and their processing (i.e. parsing transactions and executing them to change the state) work <mark style="color:red;">**independently of each other**</mark>.

This is logical - the network in one thread votes for accepted blocks, and in another thread - simply searches for the next block and proofs of approval of this block for its processing.

Since these tasks are asynchronous, the epochs on the threads may differ. Most of the time they will be the same, but sometimes they may still differ

To request the current epoch on the threads, call:

#### Verification Thread

```javascript
await web1337.getCurrentEpochOnThread("vt");
```

#### Approvement Thread

```javascript
await web1337.getCurrentEpochOnThread("at");
```

## Get current leader

Leader is a validator who generate blocks in a particular timeframe.

Each epoch, each shard is assigned a list of leaders who will receive their own window for generating blocks for a certain time.

To find out who is currently generating blocks, use this API

```javascript
await web1337.getCurrentLeader();
```

## Get epoch data by epoch index

You can find out the current epoch from the API examples above. You can also find out the index of the current epoch there.

However, if you want to study the historical data of the network, you can request data on a certain epoch by its index.

For example, to request data on the very first epoch, call this API:

<pre class="language-javascript"><code class="lang-javascript"><strong>let epochIndex = 0;
</strong><strong>
</strong><strong>await web1337.getEpochDataByEpochIndex(epochIndex);
</strong></code></pre>

## Get total number of blocks, transactions and successful transactions by epoch index

This API returns stats for specific epoch. You can use this API, for example, for time series charts. It's also useful for metrics and stats tracking:

```javascript
let epochIndex = 196;

await web1337.getVerificationThreadStatsPerEpoch()
```


# State API


# Misc API


# Consensus related API


---

[Next Page](/llms-full.txt/1)